New Tomos Transmission Service

August 10, 2014

Basic A35/A55 Transmission Service

Replacing the first speed clutch segments:

1. Once the transmission oil is drained out, and the trans cover removed, the clutch and trans are exposed.

2. The 17mm clutch nut is spun off with an impact wrench. The outer first speed clutch just pulls straight out.

3. The circular coil spring is removed. The old clutch segments are removed, preserving the orientation.

4. The new clutch segments are transferred over one at a time so as to not scramble the direction.

5. The three leaf springs are put back, with tails inside, not outside the neighbor spring’s cradle.

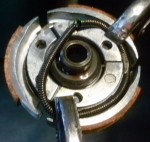
6. The circular coil spring is carefully stretched and maneuvered into position. See photos below.

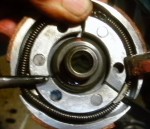
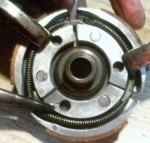
Step 6a. Getting everything ready for the spring pre-loading (stretching).

At the gaps between the segments, the leaf springs have “cradles”. These cradles prevent the spring from wandering either way and coming off. When installing, always put the c-clamps or vise grips where you can almost get two of the three cradles. Never clamp onto the spring or the brake lining. Left, initially set the clamps like this. There’s no tension in the spring yet.

>

>

Step 6b. Gently stretch with soft thumbs then clamp it

Now with both your thumbs, gently stretch and lift the spring onto the ledge, but not yet over the cradle. You cannot let go or it will come off and maybe fly away. Hopefully you have a third needle nose vise grips within arms reach that is already adjusted and ready to clamp. Without letting the spring snap back and without taking too much time, clamp the third vise grips (a needle nose vice grips like shown here is best) to prevent the spring from flying off.

>

Step 6c. Gently pry the spring over the cradle with a small screwdriver

Just like putting a tire onto a rim, that last little bit is the most difficult. It’s very easy to damage the spring by forcing it to go when it doesn’t want to. If it gets tight, release and try to take a smaller bite. If the new spring is over stretched by rough handling during installation, it will be like having an old softer one.

>

>

7. Once it snaps over the cradle you got it. Now just push on it to snap it in it’s groove all around.

8. Place the assembled 1st speed clutch back on, tighten the nut with the impact.

9. Put the two rear shaft’s shim washers 10 & 16mm in place, clean the gasket surfaces and any sludge.

9a. For Pedal Models:  Take the left pedal crank off, or at least park the pedal in the down position. The weight of that far side pedal makes the pedal shaft point wrong, causing the transmission cover to not go on right.

9b. For Pedal Models: Make sure the U-shaped clip is in it’s slot in the case wall. The starter (pedal) shaft should move 45 degrees back and forth. If only the clutches were removed, and not the countershaft and pedal shaft assemblies, then it will still be in it’s slot, ready for the trans cover to go back on. More pictures of this will be put here soon …

10. Put the trans cover on. When everything is aligned, it makes a loud clap.

11. Then tighten the trans cover bolts. Put new ATF fluid and go try it out!

Tomos Balanced Clutch Drum

August 12, 2008

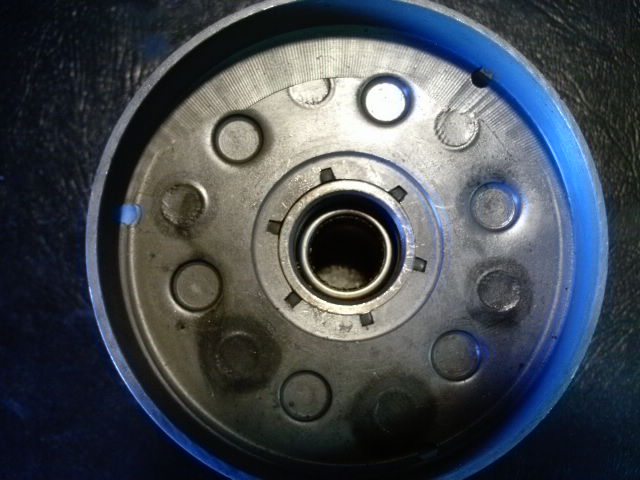
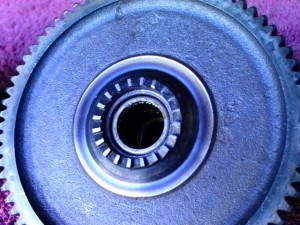
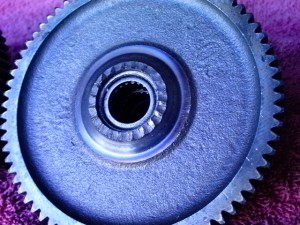
The Tomos two-speed automatic dual clutch drum, located behind the bulge in the right side of the transmission cover, is about 4 inches in diameter and made of two stamped sheet steel drums crimped onto a center tool steel precision shaft with gear. In the picture below, the view is of the outboard side, which is the first speed centrifugal clutch side. Flip it over and you would see an identical drum, facing opposite, with a small 1 inch straight-cut gear, the “first speed driving gear”, attached to the inboard side of the dual clutch drum, which is the second speed centrifugal clutch drum.

These drums can be made slightly out of round. They are machined on the inner surface only, where the clutch shoes slip and grab, according to speed. That machining is always perfect, as the inside surface is perfectly concentric with the one-way needle bearing. The proof is there is never any rapid pulsation during clutch slip. So the drum and clutches function perfectly. When the outer surfaces are out of round, the whole bike vibrates or buzzes, and gets worse when the engine is revved up going fast. That buzzing can be felt most in the hands and feet. It can make the mirrors blurry. It can make the speedometer go wild. It can make things on the bike crack, break off, or come loose.

When the drum is a little off balance, and the set of three clutch shoes is also a little off balance, then the vibration felt in the bike can become worse at times, more or less at random. This is because every time the bike slows down, the centrifugal clutches let go of the drum as the spring pulls them inward, and they begin to rotate inside the drum. Then when the bike speeds back up the clutches fly out and grab the drum, because of centrifugal force. But they end up in a new random location in the drum. If the heavy side of the clutch is opposite the heavy side of the drum, then there will be minimum vibration. If both heavy sides are together, there will be the most imbalance and the maximum vibration felt.

Other things can cause excessive engine vibration. Installing a heavier or bigger piston, like a 65cc, is the most common. Running with a loose flywheel or clutch nut is one. The magneto flywheels all seem to be balanced good, although they have not been tested. Using mis-matched clutch shoes is another. Not only should they all weigh the same, but they should all be equal in wear, not one new and two worn out, for example.

Above, the Tomos clutch drum. This one is extremely out of round, so bad you can see it with your eyes. Look at the thick wall on the left. Now compare that with the thin wall on the right side. Clearly the left side is heavier! When they’re bad they’re usually less than half this much. The out of balance clutches began around 2008. Before that, from 1976 to 2007 there was never any noticeable balancing or vibration problem. The A35 (1991-2006) and A55 (2002-later) have the same clutch drum. The A3 (1976-1990) one looks the same but parts of it are smaller or thinner.

Pressed into the center of the clutch drum is a precision roller clutch, a needle bearing that only turns one way. In the picture below, the roller clutch is installed correctly, with the plain side facing out, and the writing side facing inward. When you rotate an installed Tomos clutch drum clockwise, it engages the crankshaft. When you rotate it counter-clockwise, it spins free. When a Tomos engine seizes or hydraulics (that’s when the piston slams into incompressible liquid – gas or oil), the roller clutch can become damaged. It usually becomes tight or frozen. When a Tomos roller clutch is frozen, the bike will run fine but won’t go into neutral when you slow down to stop.

How to “balance” the drum:

A machine shop or a home machinist with a lathe, can perform a precision cutting operation. The drum is held by it’s inner surface, and turned in a lathe. The high parts of the outer surface are “skimmed off”. Try to leave the lowest part uncut, to give it the most strength.


Tomos Stripped Driveshaft

August 12, 2008

On pedal models only, not kick models, during the years 2008-2009, occasionally a driveshaft 223453 would become stripped at the ring of ramps needed for forward pedalling. This can never happen on kick models, because they do not have a ring of ramps. When the ring of ramps becomes stripped, the bike runs fine and kick starts backward fine, but the pedals just spin free going forward and do not propel the bike forward at all.

Left is a 223453 driveshaft brand new. Right is a 223453 stripped at the ring of ramps. No ped, only mo!

Some people live with it like that because it’s expensive to repair. The cast iron chips need to be flushed out, or else one chip can damage any one or even all of the gears. It’s too big a gamble to leave them laying in the bottom back corners of the transmission compartment. If the bike is ever leaned way over, the little iron chunks and bottom oil sludge will be poured over the gears.

More to follow…