New Tomos Service

August 13, 2008

Welcome to Myrons Mopeds New Tomos Service department.

Here are some articles to help you repair or lovingly maintain your 1992-later Tomos moped. 

Tomos Engines is about the 1976-91 A3, 1992-06 A35, and 2007-on A55 moped engines.

Tomos Basics is a mini owners manual, that supplements the regular owners manual.

Tomos Oil Injection is about the simple but difficult operation of installing the left engine cover.

Tomos Throttle Upgrade is about the 1992-07 “throttle valve” sliding block that sometimes breaks.


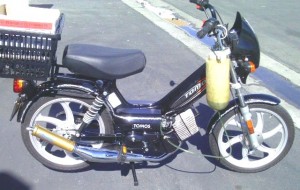
[singlepic id=584 w=700 h=700 float=none]


Tomos Basics

August 13, 2008

Table of Contents

1. Tomos Basics – supplemental owners manual info for new Tomos owners

2. Tomos Revival Battery Installation – there’s a trick to it

========================================================================================

              TOMOS BASICS for USA Models 2007-on (A55 engine)

  1. TOMOS means TOvarna MOtornih koles Sezana (motorbike factory in Sezana, Slovenia).
  2. Warranty is 6 month/4000 mile limited. Owner must send in the warranty registration card located in the owner’s manual to activate the warranty on a brand new Tomos.
  3. Engine is the A55 two-cycle 49cc  single, EPA and CARB compliant with catalytic exhaust. Speed is 30mph. Horsepower is 2hp. Transmission is two-speed fully automatic.
  4. Pedals go forward for hybrid human/motor propulsion. Pedaling speed is 5 to 10 mph. Pedals kick backward for starting engine. Pedal forward to put pedals in kick position.
  5. Gasoline is 90 octane minimum. Only Sprint model is pre-mixed with oil 50:1 or 2.5 ounces per gallon. All other models have oil injection and use straight gasoline.
  6. Gas tank size: LX 1.5gal   Sprint, ST 1gal.  Arrow, Revival, Streetmate .75gal. On the LX and ST locking gas lid, only the key turns, counterclockwise to open.  On ’05-08 Arrow, Revival, Streetmate the gas lid is push in. It pulls straight out. Sometimes it’s tight. After 2008 all gas lids are quarter-turn type.
  7. Gas valve is a manual fuel tap or shut off. It is located above the engine on the left side of the bike. It has three positions, off (horizontal), on (down), up (reserve). Use on during normal operation. Use off when not operating. Use reserve if you “run out of gas”. Reserve lasts 4 to 10 miles. Don’t forget to put it back to “on” after you gas up.
  8. Gas level is checked by opening the gas lid, looking, shaking, and listening. There is no gas gauge. On the LX you can see the whole tank. On the ST and Sprint you can see half way. On the others you can only see the first fourth. Many people choose to install a clear hose branching up from the fuel line. It serves as a gas gauge. The liquid level in the tube is the level in the tank. Gas tank vent: On Arrow/Revival/Streetmate models the gas tank is inside the frame, which is U-shaped. On one end of the “U” is the fill hole, where you add gas. On the other end of the “U” is a vent to let air in and out. It normally lets a tiny amount of air pass but not enough during refueling. When adding gas, the gas tank vent, a black spring-loaded push button, needs to be pushed each time the tank seems full to let any air escape allowing more room for gasoline. It makes a hiss sound. When the ¾ gallon tank seems full and the vent no longer hisses then it’s truly full.
  9. Gas mileage (mpg) is 100 miles per gallon, going 37mph on city streets. If you’re larger, have hills, rough roads, stop and go, your mpg (and range) will be less. If you’re smaller, more aerodynamic, and go slow, your mpg (and range) will be more.
  10. Gas range:  LX 125mi  Sprint, ST 85mi  Arrow, Revival, Streetmate 60mi. Means topped off to hitting reserve, 160lb rider on smooth flat city streets.
  11. Oil is two-cycle oil. It’s slowly consumed by burning along with the gasoline. Use a good brand, preferably synthetic, like Champion weed wacker oil. Without the oil the two-cycle engine will get hot, melt the sides of the piston, and “seize”, with a scary skid.
  12. Oil tank is under the seat, except Sprint, which is premixed in the gas. It doesn’t matter how much oil is in it, only that there always is some. Check the oil level at each gas fill-up. After several gas fill-ups it will need an oil fill-up. 13 ounces lasts about 5 gallons.
  13. Steering lock is on the left front of the frame. To lock, put the steering almost all the way to the right, push the key in while turning it to the right. Move the steering slightly until it finds the hole and goes down 3/8 inch. To unlock, turn the key to the left, pull up, and wiggle the steering if necessary.
  14. Keys: Sprint = steering lock only (2), no ignition key. No battery to turn off.
  15. Keys: ST/LX = steering lock (2) and gas lid (2), no ignition key. No battery to turn off.
  16. Keys: Arrow = steering lock and ignition (2). Turn off ignition and battery after use.
  17. Keys: Revival = steering lock, seat, and ignition (2). Turn off ign & battery after use.
  18. Keys: Streetmate = steering lock, seat, trunk, ignition (2). Turn off ign & bat after use.  Main key switch, also known as “the ignition”, on Revival is on left top of the fake gas tank. On Arrow and Streetmate it’s under the left side of the seat.
  19. Choke is manual. It’s needs to be on (flipped up) for starting when the engine is cold. After a few seconds, when the engine is warmed up, it needs to be off (flipped down). In winter, temp 40 F, the choke is left on for the first two blocks. For normal temp 70 F, the choke is left on for 10 seconds. In hot summer, temp 100 F, it’s not needed at all. Never leave it idling for long periods with the choke on or it will become “flooded”. Never use the choke when the engine is warm or it will become “flooded”. It’s better to under use the choke, than to over use it. If the engine becomes flooded, then it will need no choke and full throttle (maximum air) to compensate for the excess fuel that has accumulated. Running fast cleans it out, and is better for a two-stroke than idling.
  20. Starting:  Turn gas valve to “on”, arrow down. (or “res” if it’s very low on gas)
  21. Starting:  Turn engine stop switch to “run” symbol. It’s on the right handlebar.
  22. Starting:  Revival/Arrow/Streetmate only. Put the key in and turn it on.
  23. Starting:  Cold starting only. Put the choke on by flipping the black lever up.
  24. Starting:  Stand on the ground with the bike on its center stand. Pedal forward until the pedal on your side is in the 2 o’clock position. Have your left hand fingers on the left (rear) hand brake, ready to stop in case it comes off the stand and takes off. Have your right hand on the throttle, with the twist grip turned only just a little, or not at all. Now kick backwards. A broke-in new Tomos starts in one kick.
  25. Starting:  After it starts, rev it up by twisting the throttle. The engine needs to be revved up either stationary on the center stand or moving down the street. Starting it up and then letting it idle to warm up is not necessary or recommended. Its two-stroke crankcase already has the oil film, so it’s ready to ride immediately after starting.
  26. Starting can also be done with the tires on the ground, off the center stand. Pedal the bike forward, maybe 10 or 20 inches, to put one of the pedals in kick position.
  27. Starting can be done while moving. Just stop pedaling and kick backwards.
  28. Electric starting is on Arrow/Revival/Streetmate only. Use the above starting steps, but replace “kick backwards” with “hold the left brake and push the start button”. The start button is where your right thumb is. Then ride for 10 minutes to recharge the battery.
  29. Storage: Ride it with the gas valve turned off, to evacuate the gas from the carburetor. After about a block when it runs out, put the choke on and it will go another block. Doing this will prevent the carburetor from getting coated on the inside with tar from dried up gasoline during storage.
  30. Flooded Starting: Occasionally the moped can become “flooded”, a condition where too much gasoline and not enough air is causing the engine to not start. When this occurs, a different starting procedure must be used. First the gas valve should be turned off. The carburetor holds enough gas to run for at least a minute. Instead of minimum throttle with choke on (up), it needs maximum throttle with choke off (down), to get the most air. Once it fires, it needs the maximum throttle for awhile, maybe 5 or 20 seconds, until the rough running goes away. Then it needs 15-20 minutes of fast running to heat up the exhaust fully, to boil off any unburned gas and oil. During this period it will smoke a lot. If it does not fire within a few full kicks, then the spark plug will need to be removed and the gas or oil dried off it. If the white or brown porcelain insulator is shiny or black, then it will need a new spark plug, NGK BR7ES. Here are the causes of “flooding”. Knowing these before it happens will help prevent the problem.
  31. When a moped is leaned way over, especially with the gas left on, such as when it is being transported, gasoline can spill into the air filter or into the intake port of the engine, and result in not starting. This also can happen on Revival and Streetmate when gasoline spills over during filling. When the engine is run with the choke on too long, the spark plug can get wet with too much gasoline, and result in the engine not starting. Idling for too long, or going slow all the time can also cause this. When the engine is kicked over many times without having a spark, such as when the kill switch is left in the off position, the spark plug can get wet with gas and result in not starting.
  32. If the float valve inside the carburetor malfunctions, gasoline can spill into the air filter. A tiny fiber can cause that, or tar from a long time sitting, or a worn needle valve and/or seat. If the oil injector leaks oil into the engine during storage, then the spark plug can get wet with oil. Remove the spark plug, kick over the engine to push out any excess oil, and clean the oil off the plug.

========================================================================================

Tomos Revival Battery Installation

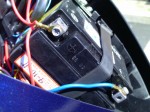
Left, two views of the Revival battery. It’s a common size used on most modern 49cc bikes with electric start. It’s a 12 volt 4 amp-hour, gel cell sealed type, BTX4L-BS or compatible. It has to lay sideways and the rear terminal wire has to be like shown, or else the cover won’t close all the way. Even when it is correct the cover has to be pushed tight to make the screw holes line up. 


Tomos Oil Injection

August 13, 2008

Tomos Oil Injection and Left Engine Cover Service
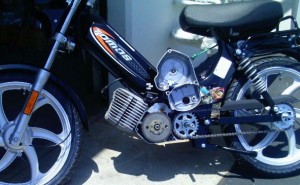
2011 Tomos ST with left cover removed.

Tomos has made oil injected mopeds, US models, for over 33 years, since the 1979 Silver Bullet. Ever since, every deluxe Tomos with oil injection has a small oil pump mounted onto the left engine cover, over the magneto. They have an excellent reputation. The highest mileage mopeds, in general, are the oil injected ones. When the engine is not too modified, the oil injection gives it the right amount of oil, automatically, all the time. You don’t have to mix the two cycle oil with your gasoline if you have oil injection. Serious commuters and most people in general prefer the convenience of oil injection and are willing to pay a little extra for it.

>

>

Above, close up of 2011 ST flywheel. At center, the special nut with a groove in it for the oil injection pump. Until about the mid 2000’s, the magneto nut had two outer prongs that held an free floating aluminum disk with a groove in it. This upgraded nut has a steel disk rubber mounted and bonded to the nut. Click to enlarge any of these pictures.
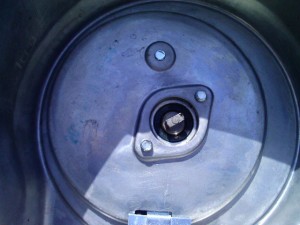
Inside view of left engine cover showing oil pump tongue.

The left cover is easy to remove, but hard to put back. The tongue on the oil pump must be pointed in the same direction as the groove in the flywheel nut. Besides that, two precision 9.8mm sleeves, one at the upper cover bolt, and one at the lower cover bolt, must line up with their holes in the aluminum engine case. What is difficult is you can’t see it. It’s a “blind operation”, which is something that is done with your eyes closed, mostly by feel. When you think the tongue and groove are at the same clock position, say 12 o’clock, then you must turn the cover around and place it exactly on the two alignment sleeves. It usually never goes all the way on until you hit it lightly with the soft side of your fist. When it’s not lined up, it makes a thud or thump, and there is still a small, like 1/16 inch gap between the cover and the case. When it is lined up, hitting it lightly makes a loud clap, as the aluminum cover slaps or snaps together with the aluminum engine case.
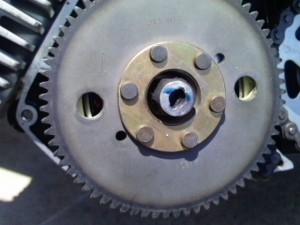
On this flywheel nut, the oil pump groove is completely rounded. It no longer drives the pump.

As long as the person doing the service does the procedure properly (lining up the tongue and groove) and does not leave out the alignment sleeves, the oil injection performs reliably for many tens of thousands of miles. The most common source of trouble is improper servicing. When the tongue and groove are not engaged, there is a small 1/6″ gap between the cover and the case. If the three cover bolts are then installed and tightened down, the cover will be forced to go all the way on. Eventually the oil injection will fail when the groove hole becomes completely rounded out, and no longer engages the tongue. When that happens, the oil pump stops pumping, and soon after that the engine seizes up.

Tomos Oil Line Clamps and Oil Tank Repair

Tomos oil line clamps work good when they are put on right. Here’s all about it.
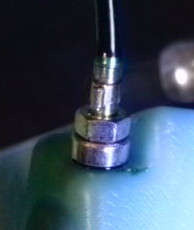
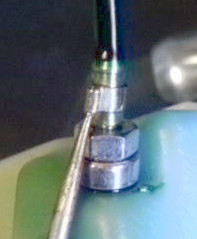
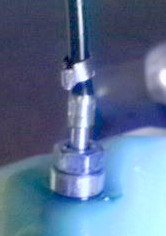
Left, factory installed clamp. Middle, spreading with a dental tool. Right, lifted over the lip of the spigot. You can see a green “tail” on the right of the cup. What’s funny is that is not the crack, but it looks like one. Slightly pressurizing the tank with air revealed that there was a crack, as oil was seen leaking out. The real crack is where the punch is in the middle picture. Nothing sticks to this kind of plastic, so plastic welding or tank replacement were the two options.

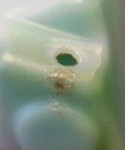
 

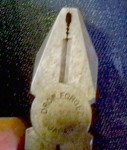
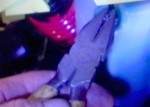
Left to right: 1) Spreading open the crack with a tapered punch. Then cleaning off the oil with spray solvent and compressed air. Then warming the plastic with a soldering iron, pushing softened plastic from either side towards the crack, filling the center. Then pulling the punch out to allow the tension to close the crack. After cooling the sealing surface around the hole is made flat with a disc grinder. 2) The plastic welded oil tank, ready to put back on. 3) An old pliers is ground away about 1/16″ from the end, to make an empty pocket for the loop part of the Tomos oil line clamp. 4) Squeezing the clamp tight with the special pliers. 5) The oil line is re-clamped properly. You cannot rotate the oil line or clamp, because it is tight. The loop of the clamp is not smashed, thanks to the cut away in the pliers.Click on the far right picture and you’ll see the rounded loop. When the loop is smashed, it can eventually break and come off. That can be a mess, or it can be a disaster.

Final Bleeding of the Short Oil Line
After the oil is put back in, the long oil line, which supplies the oil pump is bled by removing the bleed screw. Once that is done, only the short line from the pump to the engine is still full of air. The only way to “bleed” that is to run the engine on temporary gas with oil mixed in. It takes 5 or 10 minutes to go about 10 inches. The oil flows very slowly, about 3-4 drops per minute, at 7000 rpm.


Tomos Throttle Upgrade

August 13, 2008

Tomos 1991-2007 Throttle Upgrade

This is about how to repair an A35 throttle that has a bad “throttle valve”, in case the original part is not available.

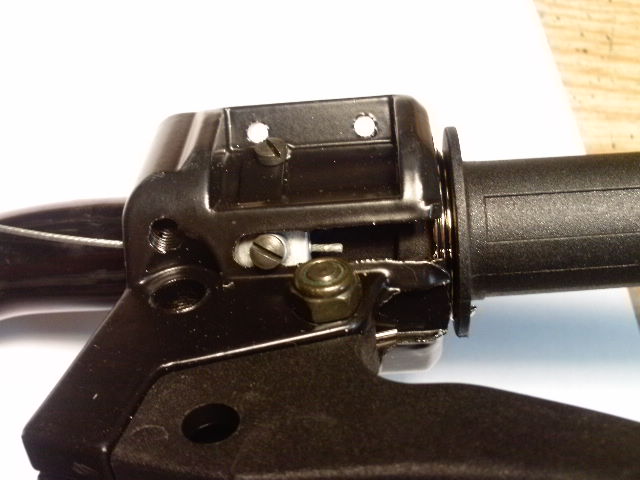
Above, the bottom view of the throttle used on all A35 (except A35 Revival) and A55 models from 1992 to early 2008. Everything is black except the light grey “throttle valve”, also known as “sliding block”. It is Tomos part number 223707. Since mid 2008 the controls are different. They say TBS, and the throttle is a wrap-around type, so it has no sliding block.

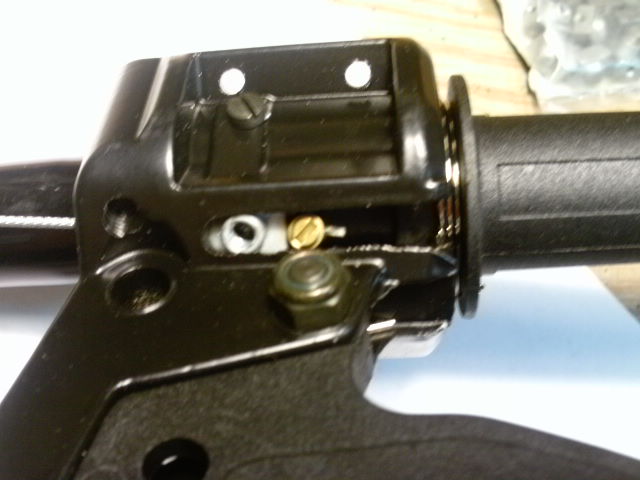
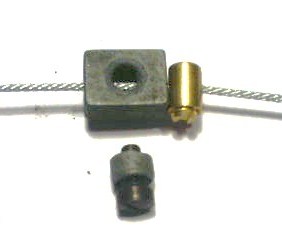
Above, the same throttle with a pinch bolt upgrade. When the sliding block breaks or strips and cannot hold onto the cable wire, a throttle pinch bolt, 5mm diameter by 7mm long is installed on a new throttle wire just behind the broken sliding block. First a new throttle wire is installed and lubed. The old sliding block must be in otherwise good condition, other than it cannot hold onto the wire. A 5mm diameter by 7mm long throttle pinch bolt is slid over the end of the new throttle wire, and positioned against the sliding block. The wire is pulled taut. The screw is tightened with a small sharp proper fitting screwdriver, very tight. With the engine not running, the throttle is operated to see if it works and feels right. Then the excess wire is cut off, with a sharp wire cutters (diagonals), when the throttle is held at max, engine off. The short tail should be about 1/4″, like shown above. Bend the tail if it hits the grip at max position.

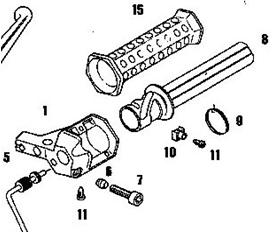
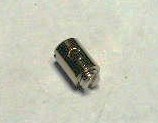
Above left, exploded view. Middle, broken 223707 with pinch bolt back up. Right, pinch bolt 5mm diameter x 7mm.

Warning. Improper installation or using a bigger or different pinch bolt might make the throttle stick or stay on. Many other things can also make the throttle stick, such as lack of lubrication, or a kinked or frayed cable. See Service/Carburetor for info about sticking throttles. Do not let anyone operate the moped if the throttle is sticking. It should always snap back to idle when you let go. This information is for service personnel and competent home mechanics, not just anyone. Please get help if you need it. Use discretion, and use this info at your own risk. The author assumes no responsibility for the use of this information.