Bing Jets

October 26, 2011

Bing jets are in Bing and some Encarwi carburetors.

3.5 mm thread (M3.5-0.60) Bing jets are on Puch-Bing, Solo-Bing, Kreidler-Bing, and Encarwi.

4.0 mm thread (M4.0-0.70) Bing jets are on Sachs-Bing, late 80’s AD-Bing and 90’s Korado-Bing.

Myrons Mopeds Bing Jet Sizes Chart

These jets are on other 1970’s – 80’s small engines with Bing carburetors. 

The Bing 3.5 main jets are also idle jets on some bigger Keihin carbs.

The Bing 4.0 main jets are also idle jets on some bigger Dellorto carbs

Original Bing jets are numbered wrong, in a sense. The jet number is not the millimeter size. An original Bing 54 is actually 0.51 mm, not 0.54. This was discovered this in the early 2000’s when aftermarket Bing jets came out. 200 jets were carefully measured with precise wire guages, and then plotted on the graph at right. The original jets (and the first A&R generics) form one line. All other generic jets form a different line.

Generic Bing jets are numbered correctly. The size they say is the millimeters they are. So a generic Bing 54 is actually 0.54 mm.


           Bing Jets (3.5 mm) 

 part #   maker   jet#  close to    measured size      price     applications

78drill   custom #00 =Bing48 0.016″ = #78 drill —————————————————————
3.5×44
  custom #00 =Bing46 0.0173″=0.440mm  $15.0  soldered, 78-drilled, then filed with .017 guitar string
Bing46  original #46 =Bing46
0.0175″=0.445mm  $18.0  76-83 Tomos early A3 models (30, 25, and 20mph)
3.5×45  custom #00 =Bing47 0.0177″=0.450mm  -N/A–
77drill   custom #00 =Bing48 0.018″ = #77 drill —————————————————————
3.5×46  custom #00 =Bing48 0.0181″=0.460mm  -N/A–
Bing48  original #48 =Bing48 0.0182″=0.462mm  $15.0  78-80 Puch (2-spd hi torque Ø12 carb 20mph)
3.5×47  custom #00 =Bing49 0.0185″=0.470mm  -N/A–
Bing50  original #50 =Bing50 0.0188″=0.478mm    none  76-78 Batavus (Laura M48 Ø8 carb 20mph)
3.5×48  generic #48 =Bing51 0.0190″=0.480mm  $4.00
3.5×49  custom #00 =Bing52 0.0190″=0.490mm  -N/A–

Bing52  original #52 =Bing52 0.0194″=0.493mm  $5.00  76-78 Batavus (Laura M48 Ø8 carb 25 mph)
3.5×50  generic #50 =Bing53 0.0195″=0.500mm  $4.00
76drill   custom #00 =Bing48 0.020″ = #76 drill —————————————————————

Bing54  original #54 =Bing54 0.0200″=0.508mm  $5.00  74-83 Puch (1-spd alum. cylinder, Ø12 carb 2.22, 20mph)
3.5×51  generic #51 =Bing54 0.0201″=0.510mm 

3.5×52  generic #52 =Bing55 0.0204″=0.520mm  $4.00
Bing56  original #56 =Bing56 0.0206″=0.523mm  $11.0  77-80 Batavus M48 and M56 (30), 80-83 Trac M56 models
3.5×53  generic #53 =Bing56 0.0209″=0.531mm  none 
75drill   custom #00 =Bing48 0.021″ = #75 drill —————————————————————
3.5×54  generic #54 =Bing57 0.0212″=0.540mm  $4.00
Bing58  original #58 =Bing58 0.0213″=0.541mm  $10.0  78-83 Puch (2-spd hi torque cyl. Ø12 carb 2.22 30mph)
3.5×55  generic #55 =Bing59 0.0217″=0.551mm  $4.00
3.5×56  generic #56 =Bing60 0.0220″=0.561mm  $4.00
Bing60  original #60 =Bing60 0.0222″=0.564mm    none  78-83 Puch (1-spd hi torque cyl. Ø12 carb 2.22 30mph)
3.5×57  generic #57 =Bing61 0.0224″=0.571mm  $4.00
75drill   custom #00 =Bing48 0.0225″=#74 drill —————————————————————
3.5×58  generic #58 =Bing62 0.0228″=0.580mm  $4.00
Bing62  original #62 =Bing62 0.0229″=0.582mm  $7.00
3.5×59  generic #59 =Bing63 0.0232″=0.591mm  $4.00

Bing64  original #64 =Bing64 0.0234″=0.594mm  $6.00  74-83 Puch (1-spd al cyl Ø14 carb 2.22 needle jet 30mph)
3.5×60  generic #60 =Bing64 0.0235″=0.600mm  $4.00
Bing66  original #66 =Bing66 0.0239″=0.607mm    none
75drill   custom #00 =Bing48 0.024″ = #73 drill
—————————————————————
3.5×61  generic #61 =Bing65 0.0240″=0.610mm  $4.00

3.5×62  generic #62 =Bing66 0.0244″=0.620mm  $4.00
Bing68  original #68 =Bing68 0.0248″=0.630mm   none   78 Sears (1s al cyl Ø14 carb 30mph), Kreidler (30mph)
3.5×63  generic #63 =Bing68 0.0248″=0.630mm  $4.00
75drill   custom #00 =Bing48 0.025″ = #72 drill
—————————————————————
3.5×64  generic #64 =Bing69 0.0252″=0.640mm  $4.00

Bing70  original #70 =Bing70 0.0254″=0.645mm    N/A   84-86 Puch Cobra (Ø14 carb, 2.17 needle jet 25mph)
3.5×65  generic #65 =Bing71 0.0256″=0.650mm  $4.00
75drill   custom #00 =Bing48 0.026″ = #71 drill
—————————————————————
3.5×66  generic #66 =Bing72 0.0260″=0.660mm  $4.00

Bing72  original #72 =Bing72 0.0260″=0.660mm    N/A   84-86 Puchs had bigger main jets, but smaller needle jets.
3.5×67  generic #67 =Bing73 0.0264″=0.670mm  $4.00

Bing74  original #74 =Bing74 0.0267″=0.678mm    N/A   1990’s Puch remakes also had 70’s jets, 2.17 needle jets.
3.5×68  generic #68 =Bing74 0.0268″=0.681mm  $4.00
3.5×69  generic #69 =Bing75 0.0272″=0.690mm  $4.00

Bing76  original #76 =Bing76 0.0273″=0.693mm  $6.00
3.5×70  generic #70 =Bing77 0.0278″=0.705mm  $4.00
75drill   custom #00 =Bing48 0.028″ = #70 drill
—————————————————————
3.5×71  generic #71 =Bing78 0.0280″=0.715mm  -N/A--

Bing78  original #78 =Bing78 0.0280″=0.711mm    N/A
3.5×72  generic #72 =Bing79 0.0283″=0.725mm  $4.00

Bing80  original #80 =Bing80 0.0285″=0.724mm    N/A
3.5×73  generic #73 =Bing81 0.0287″=0.735mm  none 
3.5×74  generic #74 =Bing82 0.0291″=0.745mm  $4.00

75drill   custom #00 =Bing48 0.0292″ = #69 drill —————————————————————
Bing82  original #82 =Bing82 0.0292″=0.742mm  $7.00 2000’s Bing Ø15 carb with smaller 2.17 needle jet
3.5×75  generic #75 =Bing83 0.0296″=0.755mm  none 
Bing84  original #84 =Bing84 0.0300″=0.762mm  none  1978-79 Puch Magnum X


cleaning a #25 jet

       Bing Jets (4.0 mm) 

At right, the smallest of the small. The #25 pilot jet is bigger than wire wheel wires, but smaller than wire brush wires in the background. It’s three hairs wide!

part number  maker  jet#  close to    measured size      price     applications

Tomos243222 Dell.  #25 =Bing27 0.0107″=0.272mm     $8  Tomos A55 pilot (idle) jet
Tomos243110 Dell.  #29 =Bing31 0.0124″=0.314mm     $8   same as Tomos #25 idle jet “cleaned” with #80 drill
D1486-030 Dellorto #30 =Bing33 0.0128″=0.325mm     $8  good for A55 pilot jet, mix screw 1 turn more out
77drill   custom #00 =Bing48 0.0135″ = #80 drill —————————————————————

D1486-032 Dellorto #32 =Bing35 0.014″ = 0.355mm     $8  same as drilled with #80 drill, sub for A55 pilot jet
77drill   custom #00 =Bing48 0.0145″ = #79 drill —————————————————————

D1486-035 Dellorto #35 =Bing39 0.0149″=0.378mm    N/A
77drill   custom #00 =Bing48 0.016″ = #78 drill —————————————————————

D1486-040 Dellorto #40 =Bing45 0.0170″=0.431mm     $8
4mBing45 Bing orig #45 =Bing45 0.0171″=0.434mm    N/A   Sachs 504/1A DK (19mph)
77drill   custom #00 =Bing48 0.018″ = #77 drill —————————————————————
4mBing48 Bing orig #48 =Bing48 0.018″ = 0.46mm      $8
D1486-043 Dellorto #43 =Bing49 0.0182″=0.462mm    N/A
4mBing50 Bing orig #50 =Bing50 0.0183″=0.465mm     $8  Sachs 504/1B and 505/1B (Ø10 carb 20mph)
D1486-044 Dellorto #44 =Bing51 0.0187″=0.475mm    N/A
4.0×48 000 generic #48 =Bing51 0.0189″=0.480mm
D1486-045 Dellorto #45 =Bing51 0.0190″=0.483mm     $8
4mBing52 Bing orig #52 =Bing52 0.0194″=0.493mm    $8.00 Sachs 504/1A and 505/1A (Ø12 carb 30mph)
D1486-046 Dellorto #46 =Bing52 0.0194″=0.493mm    N/A
4.0×50 000 generic #50 =Bing53 0.0197″=0.500mm
76drill   custom #00 =Bing48 0.020″ = #76 drill —————————————————————

4mBing54 Bing orig #54 =Bing54 0.0200″=0.508mm    $8  ’84-86 Puch Austro Daimler (30mph)

D1486-047 Dellorto #47 =Bing54 0.0198″=0.503mm    N/A
D1486-048 Dellorto #48 =Bing55 0.0202″=0.513mm    $8  Sachs 504/1A and 505/1A (without air filter box)
4.0×52 000 generic #52 =Bing56 0.0205″=0.520mm
4mBing56 Bing orig #56 =Bing56 0.0206″=0.523mm    N/A  

D1486-049 Dellorto #49 =Bing56 0.0207″=0.526mm    N/A
75drill   custom #00 =Bing48 0.021″ = #75 drill —————————————————————

D1486-050 Dellorto #50 =Bing57 0.0210″=0.533mm    N/A
4.0×54 000 generic #54 =Bing58 0.0212″=0.540mm
4mBing58 Bing orig #58 =Bing58 0.0213″=0.541mm   $8.00 Sachs 504/1D and 505/1D (Ø12 D-carb 30mph)
D1486-051 Dellorto #51 =Bing59 0.0215″=0.546mm    N/A
4.0×56 000 generic #56 =Bing51 0.0220″=0.560mm
75drill   custom #00 =Bing48 0.0225″=#74 drill —————————————————————

D1486-055 Dellorto #55 =Bing63 0.0230″=0.580mm     $8
4.0×58 000 generic #58 =Bing63 0.0230″=0.580mm
4.0×60 000 generic #60 =Bing65 0.0236″=0.600mm
75drill   custom #00 =Bing48 0.024″ = #73 drill —————————————————————

4.0×62 000 generic #62 =Bing68 0.0244″=0.620mm

D1486-060 Dellorto #60 =Bing69 0.0250″=0.635mm     $8


Mirrors

September 6, 2011

Mount Types

Clamp-on 70’s Magura

Bolt-on 80’s Magura

Bolt-on 80’s Domino


Clamp-on Mirrors

Round chrome clamp on mirror 8 inch

1. R or L round chrome
 10 inch clamp-on
fits all 7/8″ handlebars
56-9865     $20

1a. Mirror clamp $6


Screw-in Mirrors

3. R or L round black 10″
M8 screw-in reversible
right hand thread (RHT)
60-0020 $16

4. R & L black rectangular screw-in

4. R & L rectangular
black M8 screw-in
both RH thread
20-46208   $20/pair

2. R or L round black 10″ M8 screw-in reversible right hand thread

5. R or L round chrome
M8 screw-in reversible
right hand thread (RHT)
56-9808           $16


Bolt-on Mirrors

6. R or L round black/chrome 56-9901
M8 bolt-on “deep”
 also a clamp-on $15

7. Harley style mirrors
not reversible $32/set
left-only $19

Some bolt-on controls have “deep” holes, where the mirrors need to have a longer threaded section. The HR controls on 1991-2007 Tomos need M8 bolt-on “deep” type mirrors.

A “deep” type bolt-on can replace a “short” bolt-on, or a clamp-on, by repositioning the upper nut.

Either type of bolt-on can replace a right hand thread screw-in.


Tomos OEM Mirrors 1978-2013

1978 to 2008: For three decades wise Tomos used the same part number 223255 for the mirror, even though the style changed five times (’78-80, ’80-86, ’87-91, ’89-00, ’01-08). So if you wanted to get a matching mirror for the other side, you could only get one for a few years. If you waited too long, the replacement mirror would be a newer style. These 223255 mirrors were all reversible, where the glass can be made to face the reverse direction, so they work on either the right or left side.

N/A means not available. All US-model Tomos moped mirror types are shown here, but not all are for sale. 

2008 to 2013: Many design changes happened in 2008. Non-reversible screw-in mirrors were on all 2008 Tomos models, where in 2007 they were only on Revival, Streetmate, and Arrow. On those models, the Italian way (left thread) of threading a right side mirror changed to the Asian way (right thread).

Add to that confusion, a “wheel of fortune” with 100 slices, 98 rights and 2 lefts, that determines whether a new bike will get right or left hand threads, in the right mirror hole. 98% of the time, the wheel lands on “right”, but 2% of the time it lands on “left”.

RH and LH threads: Screw-in mirrors sometimes have left-hand threads. That means they screw-in the opposite direction. A right hand (RH) thread screws in clockwise. A left hand (LH) thread screws in counter-clockwise.


1978 Tomos with
 223255 78-80

223255 78-80 N/A

1978-1980 Magura controls, silver, no mirror mount holes

clamp-on left mirror             clamp-on right mirror

This mirror is a clamp-on, reversible. It has an irregular rounded shape with a white border.


1985 Tomos with
 223255 80-86

223255 80-86 N/A

1980-1986 Magura controls, black housings, left bolt-on hole

bolt-on left mirror           clamp-on right mirror

This mirror is a bolt-on, reversible. It has the same irregular rounded shape, but with a black border. It can also be a clamp-on.


1987 Tomos with
 223255 87-91

223255 87-91 N/A

1987-1991 Domino controls, all black, bolt-on mount holes

bolt-on left mirror               bolt-on right mirror

This mirror is a bolt-on, reversible. It is circular and all black. The stalk clamps in the center of the circle.


1993 Tomos with
 223255 89-00

223255 89-00 $25

1989-1990 Domino controls, all black, bolt-on mount holes

1991-2000 HR controls, all blackblue horn button, bolt-on “deep”

bolt-on left mirror                    bolt-on right mirror

This mirror is a bolt-on, reversible. It is circular, all black, and rounded in the back. The stalk clamps at the edge. The glass is very convex, so objects are closer than they appear. Many become corroded, wavy, or foggy. It is made in Slovenia by Tomos. E3 approved.


223691   $25

no photo

1991-1992 A35 Bullet, Colibri (some)

HR controls, all blackblue horn button, bolt-on “deep”

bolt-on left mirror                    bolt-on right mirror

This mirror was not used much. Most early 1990’s US models had round mirrors. That is why there is no photo. It is made in Slovenia by Tomos. E4 approved.


2003 Tomos with
223255 01-08

223255 01-08 N/A

2001-2008 Sprint, Targa, ST, LX

HR controls, all blackblue horn button, bolt-on “deep”

bolt-on left mirror                   bolt-on right mirror

This mirror is a bolt-on, reversible. It is circular, all black, and rounded in the back. The stalk clamps at the edge. The shape is like a teardrop. This mirror is not convex, and has good visibility. It is made in Slovenia by Tomos. E4 and DOT approved.


232988  N/A
R mirror L thread

2005 Revival with
left mirror 232759

232759  N/A
L mirror R thread

2001-2007 Revival, Streetmate, Arrow

Domino controls, yellow horn button, screw-in

screw-in left, RH thread   screw-in right, LH thread

These mirrors are left or right, not reversible. They are circular, all chrome, and almost flat in the back. The stalk is thick, 10mm. They are made by Orion. E3 approved.

236967 N/A
R mirror L thread

236968 $30 new
L mirror R thread


The replacement (spares) mirrors with the same part number were the later style made by SLD. These mirrors, left and right, are circular, all chrome, and rounded in back. The stalk is thin, 8mm. They are made by SLD. E4 and DOT approved.

236968 supersedes 232759        236967 supersedes 232988.


none offered
R mirror R thread

2008 Revival with
left mirror 236968

236968 $30 new
L mirror R thread

’08-13 Revival, Streetmate, St.-R, Arrow-R

TBS controls, red horn button, screw-in holes

left, RH thread      right, RH thread (most)

left, RH thread      right, LH thread (some)

This left mirror is screw-in, circular, all chrome, and rounded in back. It is made by SLD. E4 and DOT approved.


7. L Tomos 2010's round black M8 RH screw-in

236965 $30 new
R mirror L thread

8. R Tomos 2010's round black M8 RH screw-in made by twisting a left

236966 $25
L mirror R thread

2007 Arrow-R

2006-2007 Arrow-R

Domino controls, yellow horn button, screw-in holes

screw-in left, RH thread   screw-in right, LH thread

These mirrors, screw-in left and right, are circular, all black, and rounded in back. They are made by SLD. E4 and DOT approved.


2012 Sprint with
left mirror 236966

none offered
R mirror R thread

8. R Tomos 2010's round black M8 RH screw-in made by twisting a left

236966 $25
L mirror R thread

2008-2013 Sprint, ST, LX

TBS controls, red horn button, screw-in holes

left, RH thread      right, RH thread (most)

left, RH thread      right, LH thread (some)

This left screw-in mirror is circular, all black, and rounded in back. It is made by SLD. E4 and DOT approved.


None offered: Around 2007 Tomos USA changed the screw-in mirror descriptions to 236965 MIRROR BLACK RHM LHT, 236966 MIRROR BLACK LHM RHT, 236967 MIRROR CHROME RHM LHT, 236968 MIRROR CHROME LHM RHT to say what side and what thread. But the actual part labels printed in Slovenia on the non-reversible mirrors still said MIRROR CHROME (REVERSIBLE) or MIRROR BLACK (REVERSIBLE). Tomos did not supply matching right hand mirrors RHM with right hand thread RHT, for 2008 and later, to the Tomos USA inventory. So the only matching right and left mirrors for a 2008-2013 Tomos moped (US model) are aftermarket mirrors.

Twisting: One way to get a matching right mirror is to twist a 236966 black or 236968 chrome left mirror 180 degrees. This makes the straight stalk curved and leaves vise marks. If done carefully the marks and curve are not noticeable. The chrome tends to crack and does not “like” the twisting as much as the black. This is how Myrons Mopeds supplied matching right side RH thread mirrors, dozens of times, that Tomos did not offer. 

Wheel of fortune: For 2008-13 models, besides the incorrect labeling and lack of spare rights, Tomos somehow combined the supply of TBS (Domino clone) right control housings, right hand thread, with Domino right control housings, left hand threads. Some, like 2%, Tomos bikes had LH thread, while most, like 98% had RH thread. There is no way to predict which models, or years, or colors had the leftie mirror threads. This was only on the right side, thankfully. The left always had right hand M8x1.25 threads.

Since no one can say for sure what the right side mirror threads are, just by the year and model, the thread type must be determined by the owner or the person near the bike. Here are three ways to tell what thread it is:

  1. Visually. If the threads get deeper in the hole as you go clockwise with your eyes, then it is RH thread.
  2. If the left side mirror (M8x1.25 RH thread) can also screw in the right side hole, then it is RH thread.
  3. If there is a M8x1.25 bolt available, it can be used as a tester. If it can screw in, then it is RH thread.


Helmets

September 6, 2011

Helmet Size ChartWelcome to helmets. All of these are DOT approved, so they look big because they have an inch of styrofoam inside the hard shell that cushions your head, just like the bumpers in a modern car. Myrons does not sell “novelty” helmets. Novelty helmets do not have the styrofoam lining, and are not DOT approved, and do not protect your head. They just make your head look small.

Here are “half” helmets, made by THH. Ears are not covered so hearing is not impaired. Has unlimited peripheral vision. Great for under 50 mph in good warm weather. Goggles recommended for over 20 mph.

T69 has a 3-snap-on visor. T70 has a small fixed visor. T68 has no visor.

1. THH T70 white

THH T-69 white XXL $30

3. THH T70 matte black

THH T-70 flat black SXX $30
 THH T-70 flat black LXX $30
 THH T-70 flat black XLX $30

THH T69 wine red XXL $30


THH T-70 white SXX $30
THH T-70 white XXL $30
T-70 silver “tribal” L  $30

2. THH T70 gloss black

THH T-69 gloss black S $30
THH T-70 gloss black M $30
THH T-70 gloss black L $30
THH T-70 gloss black XL $30

T68 helmet

THH T-68 flat black XL $30
(no visor or visor snaps)


Here are the 3/4 shell, or “open face” helmets:

10. THH T380 red

THH T380 red Large $40


flip-up face shield N/A for 3-snap helmets
visor 3-snap black  $5 for 3-snap helmets


Stickers

September 5, 2011

Welcome to Myrons Mopeds Sticker Department. The ones that say N/A in the price are not available.


Aftermarket Stickers

Dura Lube big

2. Dura Lube oil
1990’s, 5 inch, $1

Torco oil

3. Torco oil
1980’s, 3.5 inch, $2


Dura Lube small

4. Dura Lube small
1990’s, 2 inch, $1

Champion oil large

5. Champion oil large
2000’s, 5 inch, $1

EBC brakes

6. EBC brakes
2010’s, 3 inch, $1


Champion oil

7. Champion oil small
2000’s, 4.5 inch, $1

Champion oil 2010

8. Champion oil
2010’s, 3 inch,  $1

10. UNI air filter 2000's, 3.5 inch $1

9. UNI air filter
2000’s, 3.5 inch $1


10. RK chain 2010's, 3.5 inch, $1

10. RK chain
2010’s, 3.5 inch, $1

11. Bell helmet 1980's, 3 inch, $5

11. Bell helmet
1980’s, 3 inch, $2

12. Bel-ray oil 1980's, 3 inch, $2

12. Bel-ray oil
1980’s, 3 inch, $1


13. Puch round 2 inch, $2

13. Puch round
2 inch, $2

Sport, white outline on black 1970's, 5 inch, $2

15. Sport sticker
white outline on black
1970’s, 5 inch, $2

16. Dellorto 4.9 inch $1
17. Dellorto 3.5 inch $1


Cimatti

C1. Cimatti City Bike Set 70dpi, 20″ (not avail.)


Foxi and Flying Dutchman

Flying Dutchman 200dpi 1970's, 4 inch, $?

F1. Flying Dutchman
1970’s, 3 inch, $4

F2. Foxi GT tank set, 1970’s, 9 inch, $18
F2b. Foxi GT tank set blemished, $6


Sparta coat of arms goes on rear fender 1 inch, $5

F3. Dutch coat of arms
on rear fender, 1″, $3

Sparta Foxi fenders with coat of arms stickers

Sparta Foxi fenders with
coat of arms stickers


Garelli Stickers

Garelli Gulpmatic (step-thru) tank set 1970's, 18 inch, $15

G1. 1977 Garelli Gulpmatic (step-thru) tank set
1970’s, 12 inch, $15

Garelli Super Sport (top tank) tank set 1970's, 20 inch, $22

G2. 1977 Garelli Super Sport (top tank) tank set
1970’s, 14 inch, $20


G3. Garelli oil injector instructions white on clear

G3. Garelli oil injector
instructions, 3 inch
white on clear $5

1977 Garelli Super Sport XL

1977 Garelli Super Sport XL

1977 Garelli Gulpmatic

1977 Garelli Gulpmatic


Motobecane Stickers

Motobecane 50V 1977-80 rear M 2 inch, $1

M1. Motobecane
rear M, 2 inch, $1

Motobecane 50V 1977-80 tank set

M2. Motobecane 50V 1977-80 tank set
black vinyl on brushed metallic, 9 inch   N/A

1978-79 Motobecane 50VL

1979 Motobecane 50VL


Motobecane 50V 1977-80 side set

M3. Motobecane 50V Mobylette 1977-80 side set
black vinyl on brushed metallic, 20 inch,  N/A


Peugeot Stickers

P1. Peugeot side set black on silver metallic

P1. Peugeot side set
black on silver metallic
1970’s, 6 inch, $5
singles $2.50

Peugeot 103 LVS tank set pearl white and chrome

P2. Peugeot 103 tank set, white and metallic
(no more available) N/A

1978 Peugeot 103 LS


Peugeot 103 side emblem gold on white

P3. Peugeot
side emblem
gold on white 1970’s $18 ea

Peugeot 103 side emblem gold on red

P4. Peugeot
side emblem
gold on red
1970’s   N/A

Peugeot 103 LVS tank set copper orange and chrome

P5. Peugeot 103 LVS tank set copper, $20
left side only singles $7

Peugeot 103 ivory/orange

Peugeot 103
ivory/copper


P6. 103 tank, right side only, brown, $5


P2. Peugeot side set white outline on black

P7. Peugeot side set, 6 inch
white outline on black, N/A

Peugeot 103 SP tank set green

P8. 1978-79 103 SP tank set olive green
1970’s, 11 inch, right only $10 no lefts

1978 Peugeot 103 SP

1978 Peugeot 103 SP
olive green metallic


Peugeot gas valve label

P9. Peug. fuel
1 inch,   N/A

Peugeot 103 1980 tank set light green

P10. Peugeot 103 1980-83 tank set light olive
1980’s, 11 inch  N/A

1980 Peugeot 103 LVS restored by B. Small

1980 103 LVS, restored by B. Small


Peugeot Variateur 1978-on metal belt cover

P11. Peugeot Variateur
’78-on metal belt cover
These often fall off. N/A
Requires adhesive.

Peugeot 1980's 103 SP olive right side only

P12. Peugeot 1980’s 103 SP gas tank
light olive, right side only, singles $10

1980 Peugeot 103 SP olive-silver w/black trim

1980 Peugeot 103 SP
light olive metallic


Peugeot 103 1980 side plate set

P13. Peug 103 80’s
side plate set $20
silver, blue, org, blk

Peugeot 103 1980 right side tank blue

P14. Peugeot 1980’s 103 gas tank
silver-blue, right side only, singles none

1980 Peugeot 103 LVS

1980 Peugeot 103 LVS


Puch Stickers

Puch spark plug black on clear N/A white on clear $5

P20. Puch plug
black on clear N/A
white on clear $5

Puch fuel

P21. Puch fuel
black/clear N/A
white/clear N/A

P22. Puch 1977 Maxi
white outline on black
1970’s, 4 inch, $8 ea

1977 Puch Maxi

1977 Puch Maxi


Puch HP 2

P23. Puch HP 2
black/clear N/A
white/clear N/A

Puch choke

P24. Puch choke
black/clear $4
white/clear $2


Puch 1976-77 Maxi Sport

P25. Puch 1977 Maxi Sport
white outline on black
1970’s, 9 inch, $10 ea

1977 Puch Maxi Sport

1977 Puch Maxi Sport


P26. Puch 1978-80 Maxi tank set
black, white and green, 9 inch  N/A

P15. Puch Maxi Sport tank accent set gold

P27. Puch Newport L
tank accents gold $15

1978 Puch Newport L black

1978 Puch Newport L
black with gold accents


P12. Puch Newport tank set black and red, 9 inch $12

P28. Puch Newport tank set
black and red, 9 inch N/A

Puch 1978 Newport L rear sripes behind seat

P29. 1978 Newport L
rear accents red $10

1978 Puch Newport L white

1978 Puch Newport L
white with red accents


P30. Puch Maxi P31. Maxi-Luxe P32. Puch Sport

P30. Puch Maxi side panel, 9 inch, N/A
P31. Maxi-Luxe side, home made, $2 ea 
P32. Puch Sport side panel, 9 inch, N/A

Puch 1978 Maxi Luxe

Puch 1978 Maxi Luxe

Puch 1978 Sport

Puch 1978 Sport


P33. Sport MkII side panel, 9 inch, N/A
P34. Newport (oil inject) side, 6 inch N/A 
P35. Newport L side panel, 6 inch, N/A

Puch 1978 Sport MkII

Puch 1978 Sport MkII

Puch 1978 Newport

1978 Newport (oil inj)


P40  gray  magneto cover emblem $10
P41  black magneto cover emblem $13
P42  painted  mag. cover emblem N/A


1976 Sparta Deluxe

1976 Sparta Deluxe

Sparta Stickers

S1. Sparta tank set black and white on chrome

S1. Sparta tank set black on chrome, 10 inch, $20


S1. Sparta side set black and white

S2. Sparta side set, black and white, 8 inch, $20

Sparta Buddy (NL model)

1970’s Sparta Buddy
(NL model)

Sparta Lucky (NL model)

1970’s Sparta Lucky
(NL model)


Sparta coat of arms goes on rear fender 1 inch, $5

S3. Dutch coat of arms
for rear fender, 1 inch, $3

1980 Sparta Buddy (US model)

1980 Sparta Buddy
(US model)
aka Flying Dutchman

1978 Sparta Flying Dutchman aka Sparta Lucky

1978 Flying Dutchman
(US model)
aka Sparta Lucky


Tomos Stickers


Tomos 2007-on engine side cover chrome on black

T3. Tomos A55
engine side cover
chrome on black
2002-13, 4″, none

2012 Tomos Sprint

2012 Tomos Sprint

Tomos 2007-on engine side cover orange outline/clear

T4. Tomos A55
engine side cover
orange outline/clear
2006-08, 4″, $8 ea

2008 Tomos Arrow Racing


Tomos Limited Edition running rabbit emblem thick clear over chrome and black

T5. Tomos emblem
2″, thick clear over
chrome/black $15
thick but flexible
for curved surfaces

2005 Tomos LX 50th Anniversary Limited Edition

2005 Tomos LX
50th Anniversary Limited Edition

Tomos License Plate Frame 9 inch, $15

T6. License Plate Frame
aluminum, 9 inch, $15


T7a Sprint 1996-1999
sticker set 229772 N/A

Tomos Sprint 1993-05 complete sticker set

T7b Sprint 2000-2005
sticker set 229772 N/A

2001 Tomos Sprint

2001 Tomos Targa

2001 Tomos Targa


Tomos made the Targa and Targa LX from 1994 to 2001. In 2002 Tomos stopped using the name Targa (because Porsche owned the rights). The decals were the same, except the word Targa became Tomos. In 2002 Tomos also stopped selling the Targa and Targa LX replacement stickers.


Tomos LX 2002-05 Sticker Set complete

T8. Tomos LX 2002-05 and Targa LX 1996-01
complete sticker set, 15 inch,  N/A

2005 Tomos LX

2005 Tomos LX

2004 Tomos Tomos

2004 Tomos Tomos


2005 Tomos LX

2005 Tomos LX

1998 Tomos Targa LX

1998 Tomos Targa LX


In 2002, 2003, and 2004 the Tomos, formerly the Targa, caused confusion by having the same maker and model name. That changed in 2005 with these new graphics and the new model name ST. Two years later, the engine (A35 to A55), engine covers, seat and fork changed in 2007. The ST engine cover side stickers are not used on the 2007-later ST with A55 engine, but the replacement sticker set remained the same.

Tomos 2005-2013 ST sticker set

T9. Tomos 05-13 ST sticker set 236450  $20

2005 Tomos ST

2005 Tomos ST

2005 Tomos ST

2005 Tomos ST


2011 Tomos ST

2011 Tomos ST

2011 Tomos ST

2011 Tomos ST


Tomos LX 2005-2012 sticker set

T10. Tomos LX 2005-2012 sticker set, N/A

2007 Tomos LX

2007 Tomos LX


Tomos Revival 2002-2004 sticker set

T12. Tomos Revival
sticker set 2002-04  N/A
and Revival TS 2005-12

2004 Revival A35

2004 Revival, A35 engine

2007 Revival TS

2007 Revival TS, A55 engine


Vespa (Piaggio) Stickers

V1. Vespa (Piaggio) Grande center panel below seat

V1. Vespa (Piaggio) Grande 068
1980-85 center panel below seat


Other Accessories

September 5, 2011


License Plate Brackets

License plate brackets (all with 6″ license plate hole spacing):
1. Two-hole rubber-mounted w/ M6 bolt  $8
1a. Two-hole flat plain, without hardware $5
2.  One-hole with lip with M6x12 hex bolt $7
3.  One-hole with lip with M6x12 hex bolt $7
4.  One-slotted-hole with M6x12 hex bolt $7


license plate frame $1


Cable Locks

Left, 1800 x 10 mm with mount, 2 keys $15
Right, 1800 x 14 mm with mount, 2 kets $19


Other Accessories


Part #          Description                         Price                      

150602  chrome spikes “krometts” 1/4″ bolt on $2
107531  cover for storage Covermax Scooter $35
107511  cover for storage Covermax Motorcycle $40
171270  footpegs flip-up square 12mm hole $12
171250  footpegs flip-up round 10mmx25 post $10
236490  footpeg set Tomos Revival & smate $45
000013  footpegs highway pegs for Revival $25 Clamps onto a 7/8 or 1″ bar
546000  kickstand side mount heavy duty $25
632502  tie downs pair black nylon easy kind $12
150511  battery charger 12V automatic Yuasa $40
221601  license plate reflector (button) red $1
221608   license plate reflector (button) blue $1


Manuals

September 5, 2011

Welcome. Printed manuals are listed in alphabetical order. Some are new original reproductions. Some are new but modified, enhanced, combined and edited. Most original manuals are used, but complete. They are all checked for the correct pages, and any missing or damaged pages are copied (from another manual) and added in. Most manuals are black and white print, except for the cover. Some are black and white copies. Most of the copied manuals are in a slide-type binder with a clear cover. 

Links to online manuals are also listed here.

Project Moped Manual  https://drive.google.com/drive/folders/1A-VWZahNUwwOMdH_KvlOAo8Pie0a2C6L  Project Moped Manual is where to go to find original manuals. Clicking on that is like entering the library or museum. It’s a big collection! The manuals are listed A to Z, with details. Most are free downloads that take a couple of minutes.

Moped Army – Wiki – Repair Manual Links  https://www.mopedarmy.com/wiki/Repair_manual_links  Here are link to several sources that have collections of moped manuals (free pdf files), and to some individual online free manuals. Very appreciated.

Moped Army – Wiki – Repair Tutorials  http://www.mopedarmy.com/wiki/Category:Repair_tutorials  Moped Army has hundreds of good user supplied articles on many service topics. Pick and choose what you want to read about.

Lucky 2 Strokes https://www.lucky2strokes.com/Free-Moped-Repair-Manuals-s/2067.htm Large library of free pdf downloads. Very appreciated!


Batavus (Laura M48 engine)

Laura M48 Service Manual 1972

Laura M48 Engine
Service Manual 1972
new $25

1972 Anker Laura M48 parts list header

1972 Anker Laura M48 Spare Parts List
none available in print


Both of these beautifully illustrated manuals are on display in the Moped Info and Parts / Laura Motor section. The pages can be individually copied or viewed. 

https://www.myronsmopeds.com/category/laura-engine/

The 1972 M48 looks identical to the 1977 version, except the head fins are totally round and the ignition spark coil is internal.


Batavus VA and HS50 (M48) Parts

Batavus VA, HS50
Laura M48 engine
Spare Parts Catalog
used $25

Batavus M48 Models Service

Batavus VA, HS50
Laura M48 engine
Service Manual
used $32

Batavus Starflite (M48) Parts

Batavus Starflite
Laura M48 engine
Spare Parts Catalog
used $20

Batavus 1976-78 (M48 models) Service Manual by Clymer

Batavus 1976-78
Laura M48 engine
Clymer Repair Manual  N/A


Here is a link to Batavus M48 service information and technical notes: https://vintagemopeds.files.wordpress.com/2015/02/m48-tech-notes.pdf


Batavus (Laura M56 engine)

Batavus Regency (M56) Parts

Batavus Regency
Laura M56 engine
Spare Parts Catalog
used $12

Batavus M56 Models Service

Batavus Regency
Laura M56 engine
Service Manual
used $22 copy $15


Peugeot 102, 103

1976-83 Peugeot 103 Clymer Manual free pdf download, from Project Moped Manual

Peugeot Manuals

Actual Peugeot Manuals for Sale

1. Peug 102/103 Clutch Manual copy    N/A
2. Peug 102 Dealer Manual orig  02/80 $22
3. Peug 103 Dealer Manual copy 02/77 $12
4. Peug 103 Dealer Manual orig 02/77 $22
5. Peug 103 Dealer Manual orig 10/79 $26
6. Peug 103 Clymer Manual copy 1978 $12
7. Peug 103 Clymer Manual orig new   $27
8. Peug 103 Owners Manual good copy $5
9. Peug 103 Owners Manual original    $18

#6 and 7 are in the link below, free viewing

At top, a brown notebook of manuals:
dealer parts, service, Clymer service,
dealer service bulletins, and
troubleshooting sheets. price $26


Peugeot Parts Manuals

Peugeot Parts Manuals

Peugeot Parts Manuals

Peugeot Parts Manuals

Peugeot Mopeds Parts Manuals, USA Models, used but good condition, for sale. All pages checked for any missing. The lighter brown notebooks are the “Ref 80” early version. Price $30. The thicker dark brown notebooks are the “64390” version. Price $35. The same notebook cover is used for many different versions just by putting in different sheets. That’s why the cover has English, Spanish, Italian, and French language on it, but inside it’s 99% English, 1% French.


Tomos 1974-91 (A3 engine)

1979-83 Tomos Bullet, Silver Bullet Service Manual free pdf download, from Lucky Two Strokes

1989-91 Tomos Bullet, Golden Bullet Owners Manual free pdf download, from Lucky Two Strokes

Myrons Tomos A3 Service Manual
1975-91, 110 pages, 3-ring binder $12

Table of Contents for Myrons Tomos A3 Service Manual 
This is three manuals enhanced with many extra info sheets.


77-88 Parts Book $5 used, 49 page

78 Parts no cover $3 used, 48 page

’78 Parts Catalog $5 used 48 page


80 Parts no cover used $3 52 page

’80 Parts Catalog $5 used, 52 page

’87 Parts Catalog $5 used 58 page


Tomos 1992-06 (A35 engine)

1996-97 Tomos Targa, Targa LX Parts Catalog free pdf download

Tomos A35 Service

’04 Service Manual $39
103 pages, many photos

’00-06 Tomos Sprint, Targa,
Targa LX Owners Manual  $5
16 pages 1-sided, direct copy

A35 Owners Manual  $7
18 pages 1-sided


2002 Revival Owners
Manual $6  direct copy
28 pages 1-sided

1996-97 Sprint Parts Catalog  $10 20 pages

2000-06 Tomos Sprint Targa Targa LX Owners Manual very worn cover but good inside $3 used

2003-06 Parts
new $9 43 page


Tomos 2002-18 (A55 engine)

Tomos A55 Info and Tuning Manual  free pdf download, from tomosforum.nl

Tomos A55 Info & Tuning Manual  $6
This is a technical masterpiece, the best and most complete. By R.L. Vuyk. 29 pages

Tomos Arrow Owners Manual $6
12 pages 1-sided

Tomos A55 Manual N/A


’05-12 Streetmate Parts Catalog $9 new 42 pages

2005-06 Tomos Sprint ST LX Owners Manual $14 good-used 17 pages

2007-18 Tomos Sprint ST LX Owners Manual $19 new clean 17 pages

2007-18 Tomos Sprint ST LX Owners Manual N/A new clean


Vespa (Piaggio)

Myrons Vespa Service Manual


Baskets & Boxes

September 5, 2011

<<<<<  B A S K E T S   and   B O X E S  >>>>>  These are ones suitable for mopeds. Many others exist.

Part#   #  xxxxxxx  Description xxxxxxxxxx     Price

90052 N basket rear black Sunlite 15x10x5in     $22 

9015   O basket rear tall silver Wald 14x9x9in    $15 

9018   C basket folding black Sunlite 12x7x8in   $25

none   D basket folding giant NOS set w/mount  $60

632627   luggage box locking wine red 12x12x8 $60

632626   luggage box locking black    12x12x8″ $60

619010 I luggage box emgo black detachable     N/A

632622   luggage box black w/lites 16x15x11″   N/A

632875   lock for luggage box 63262x w/keys    $12


Shirts

August 21, 2011

Mens tee-shirt back and front, bright blue, sizes S, M, L $12,   XL, XXL  $15
Ladies with short-cut sleeves, bright blue medium or light gray large  $10


Tomos shirt, back view
Med, Small   $10


Assembly and Preparation

July 1, 2010

Welcome to Myrons Tomos Assembly and Preparation tutorial. This is to help folks who live far from any Tomos dealer, who already bought or are thinking about buying a new Tomos moped, in the box.

If you are not familiar with hand tools and mechanical work, then get someone who is to help you. These procedures are not for everyone. They’re for experienced mechanics and people who are skilled in using hand tools. Some procedures below, when mistakes are made, can result in injury or damage to the bike. Be advised.

How to Assemble a New Tomos Moped

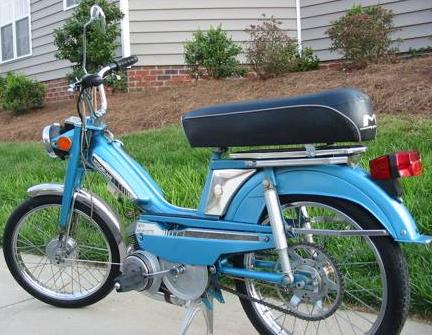
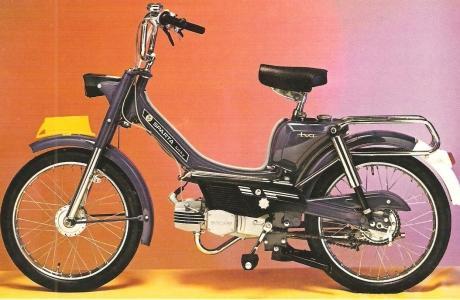
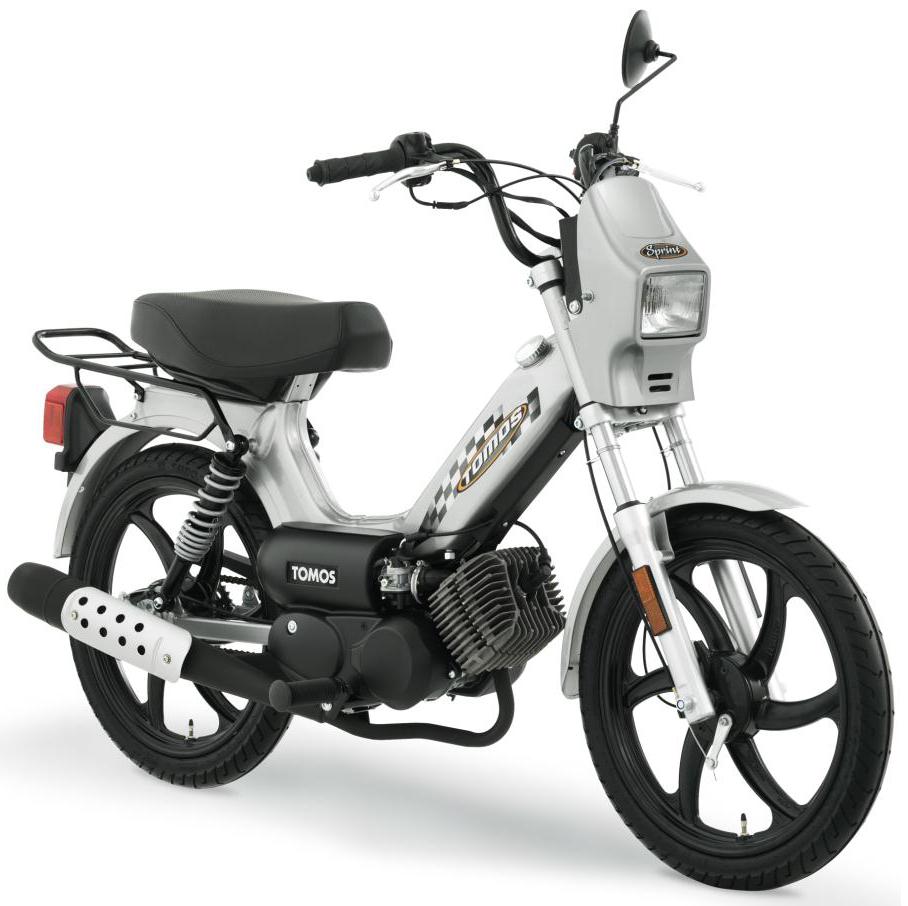
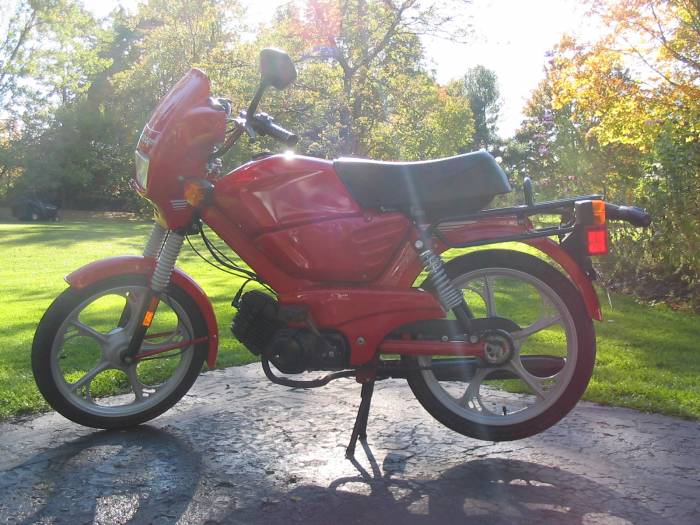
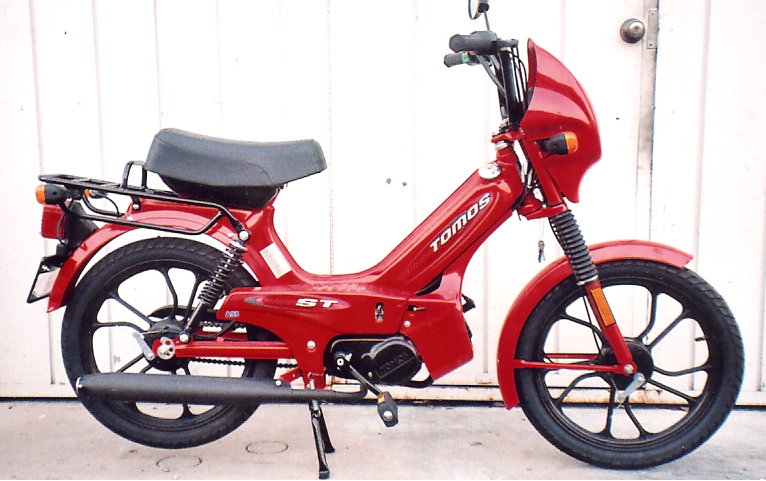
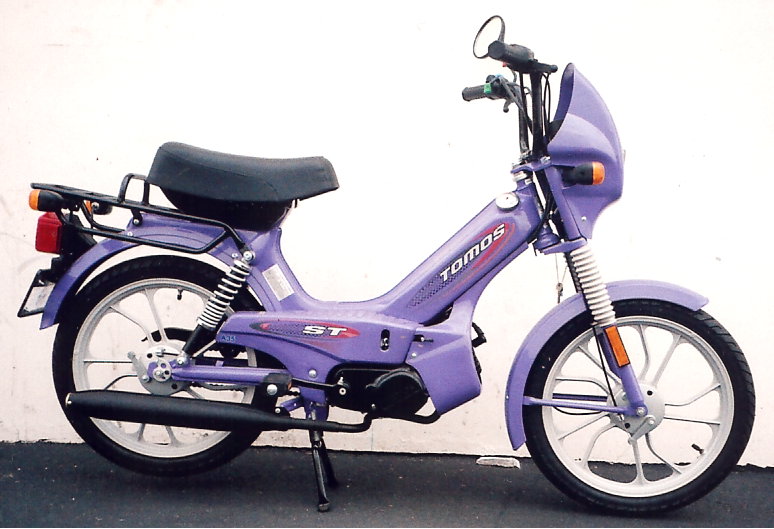
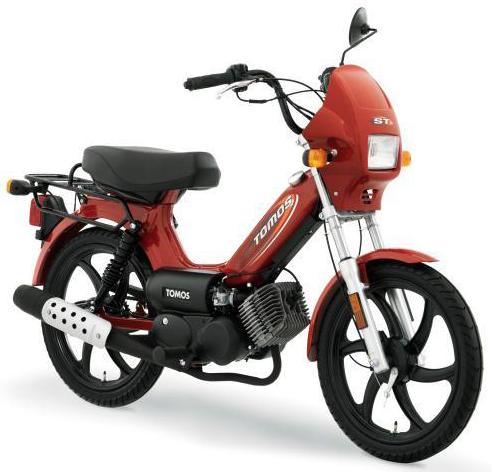
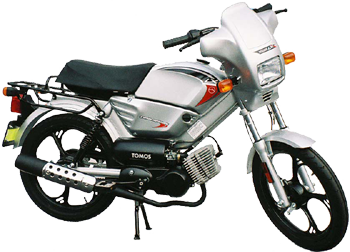
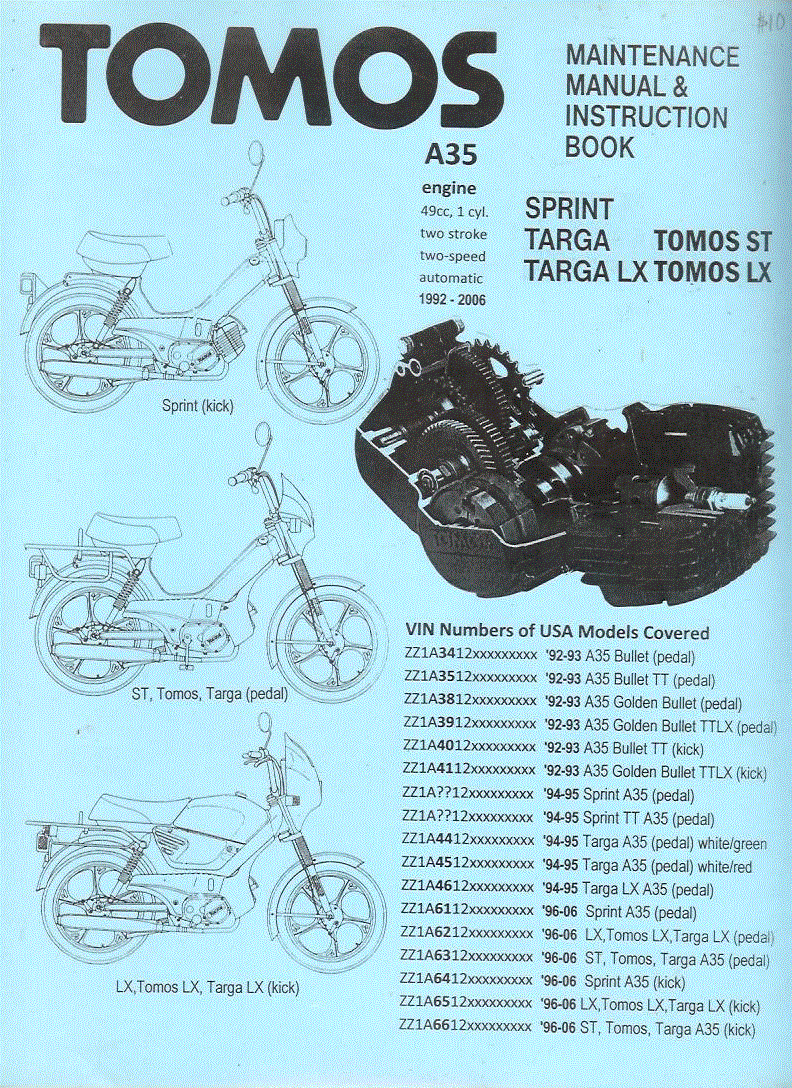
These instructions are for the pedal versions. Each of the six 2011-2012 Tomos models (Sprint, ST, LX, Revival, Streetmate, Streetmate-R) comes with either pedals, or footpegs with kick starter. For kick models, every instruction is the same except “pedal” steps 10 & 11 are different.

Tools:  3, 4, 5, 6mm allen wrenches, with sharp corners, not worn (rounded), 19, 17, 15, 13, 11, 10mm open wrenchs, 8 inch crescent wrench, 12 inch crescent wrench, hammer, punch, box knife, scissors, #2 phillips screwdriver, plain screwdriver, air pump, a wratchet wrench with sockets 10,17 mm, and possibly a Dremmel high speed cutting tool for carving plastic. 

1. Remove from box. Two people can lift it out without cutting the box. With one person, cut the whole side of the box off, and lift it out sideways from it’s crate, rear wheel first, then front. Then roll it away. Unpack and unwrap everything. Lay out small parts in organized groups. Learn what everything is and where it goes. Take inventory. If it’s a battery model, put the 12V battery on a trickle (1 or 1.5 amp max) charger for 30 to 60 minutes.

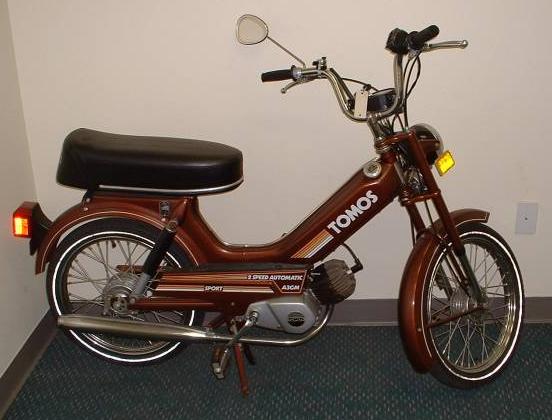
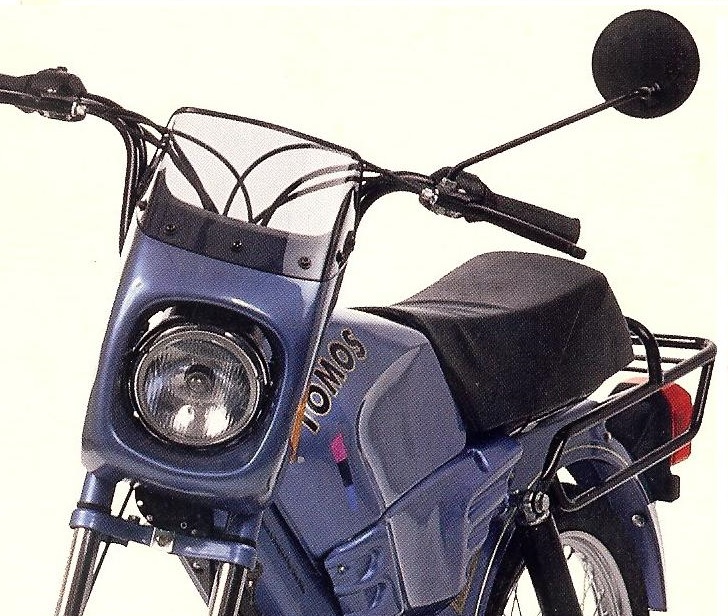
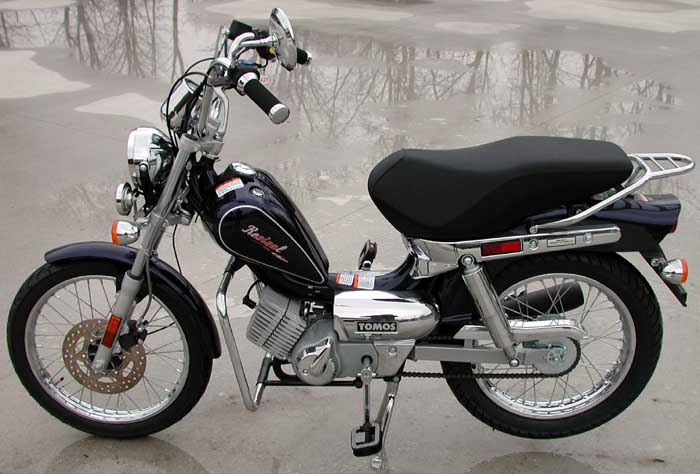
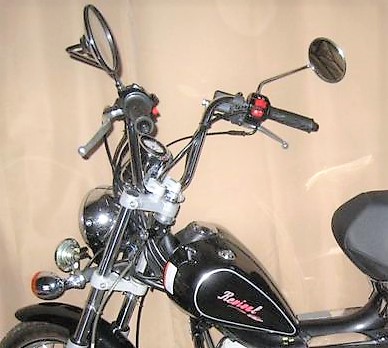
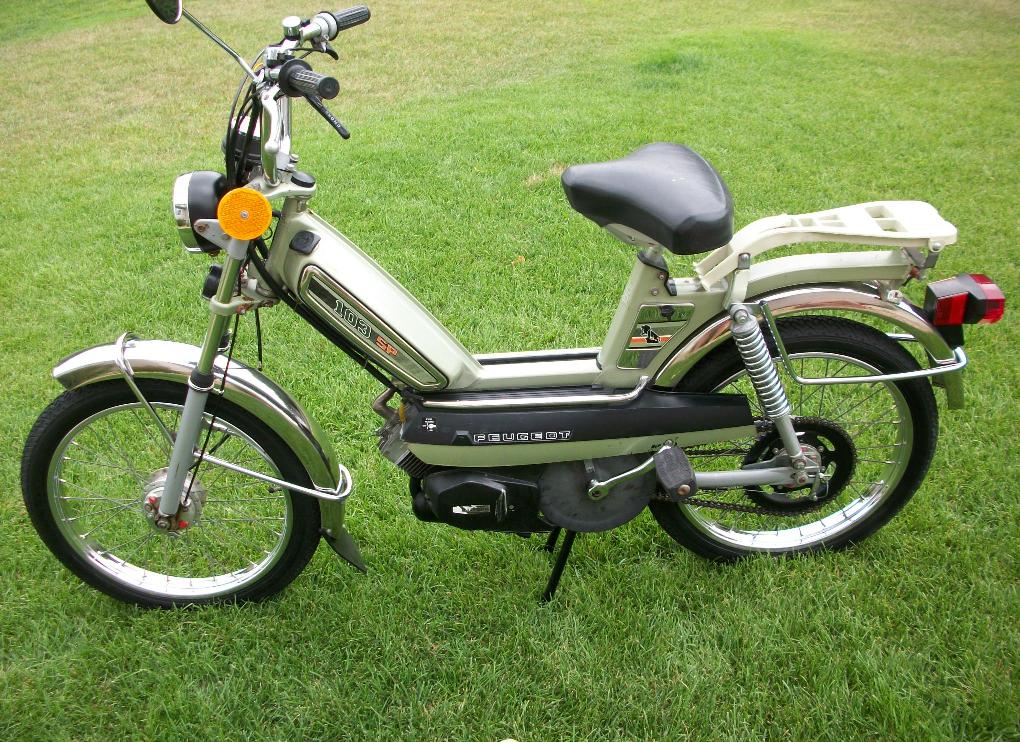
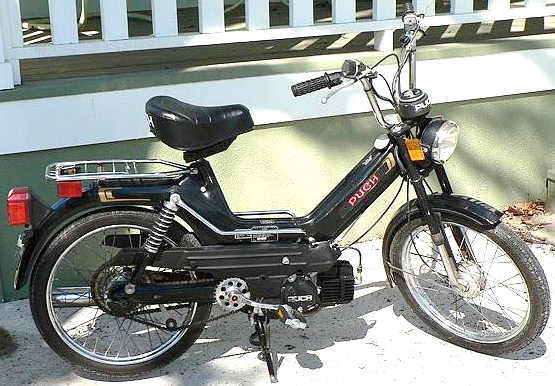
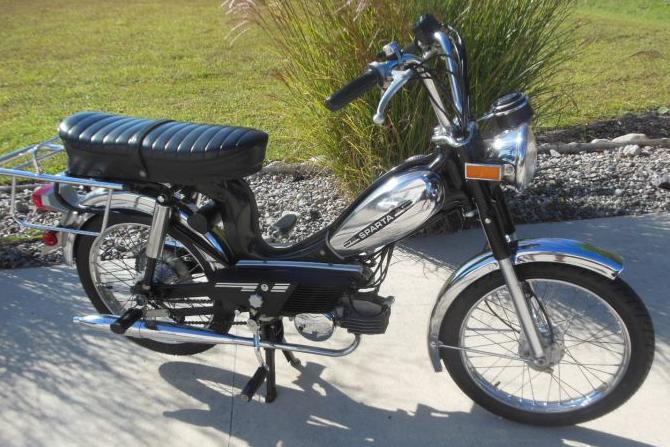
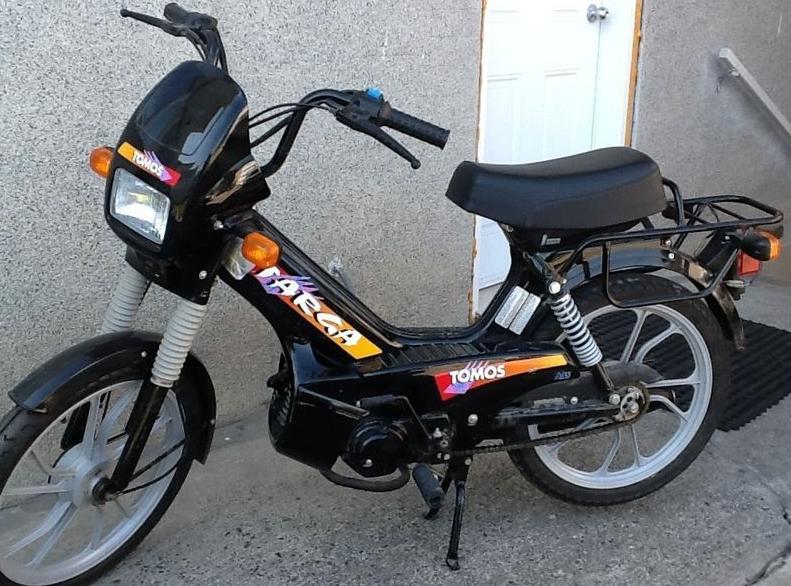
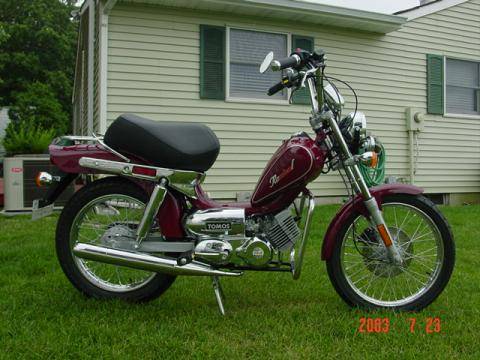
Above, a 2011 Streetmate-R, unpacked. It’s about 95% assembled. All cables, wires, brake lines are attached and ready. Small parts box is unpacked on floor. From left to right, screwdriver and spark plug socket, 4 M6 allen bolts (5mm hex) for handlebar clamps, 4 M6 nuts, 2 handlebar clamps (black for Streetmate-R, silver for all others). Under those flat on the floor is the black tool pouch (that contains the handlebar hardware). Then one M5 button-head allen bolt (3mm hex) for oil pump cover, black plastic oil pump cover, black plastic left & right pedals. Behind pedals is battery and battery pads. Then two 9.5mm wedge pins for pedal crank arms, two M7 washers, two M7 nuts, pedal shaft right side parts, inner washer, spring, cup, and outer tube. Then right and left black pedal arms, left mirror, two keys, and the owners manual.


 2.  Install the handlebars. First put a little (1/2 a match head) grease on the threads of the 4 M6 allen bolts. Don’t let grease get on anything else. The four M6 handlebar clamp bolts go through the aluminum fork top. On the bottom side of the fork top there are four hexagonal holes for the handlebar clamp nuts.  Hold (yourself or ask someone else to help) handlebar and clamp in position, then hold each nut with a finger tip, up in the hexagonal hole, while twisting the 5mm allen with fingertips. Both hand’s fingertips are feeling for the threads to engage, when they don’t, you back up, reposition the nut slightly, and retry.

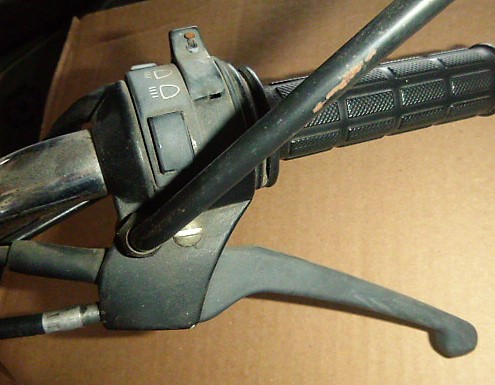
2A. Install the speedometer. (for Streetmate, Streetmate-R, or Revival) These “battery models”  have a speedometer mounted to the front two handlebar clamp bolts. First put the two rear handlebar clamp bolts on loose, first. Then put the speedometer mount plate below the handlebar clamps. Then put the two front handlebar clamp bolts on. Position the handle bar in center, and with the brake levers angling in the direction of the riders forearms, or sightly more downward than that. So tall riders with low handlebars need their brake levers more downward, like 45 degrees. Short riders with tall handlebars need their brake levers more upward, like horizontal. Otherwise it’s difficult or uncomfortable to use the hand brakes. With high rise handlebars, rotating the handlebar changes the lever angle, but more importantly, also changes the distance from bars to rider, and the way the steering feels. It is suggested to position the handlebar so that it is slightly, about 5-10 degrees, forward of the plane of the fork. Tighten the front two handlebar clamp bolts fully.

When all four bolts are on, clamps are even, handlebar is centered, and rotated slightly forward of the plane of the fork, tighten the 5mm allens fully tight, to 7 ft-lb. You need a sharp 5mm allen with a long (6″) handle, or a short handle extended with a piece of thin pipe or some other tool. With an improper tool it’s easy to slip and cause damage, like rounding out the hex-hole or scratching the paint or yourself.

3. Adjust the steering bearings. Most bikes have the steering adjusted too tight, where the handlebars like to stay in a straight ahead position, or the steering does not move freely. Check for this by sitting on the bike, on the centerstand, so that the front wheel is in the air, and feel the effort needed to move the handlebars from side to side. They should move freely and not have any tight spots, especially in the center position. If the steering feels too tight, loosen the top steering nut “crown nut” with the 12 inch crescent, then tap the notched cone, below the nut and below the fork top, with a hammer and pointed punch, to rotate it counterclockwise about 1/4 turn, or as needed. Then re-tighten the crown nut (steering lock nut) to 30 ft lbs, and then re-check the steering movement. When the steering is too tight, it is not possible to ride or walk the bike, and steer it by slightly leaning, with no hands on the handlebars. When the steering is too loose, when the front brake is first applied the front of the bike will jolt or judder, as the front end shifts in the frame because of too much play in the steering bearings. Without riding the bike, you can detect a loose steering by placing your fingertip across the gap between the frame bearing race (cup) and the fork bearing race (cone). The two things should turn but should otherwise feel completely solid.

4. Install the oil pump cover. (non-Sprint models only) It’s tab goes in a slot and then it rotates counterclockwise to lock in, held by an M5 allen bolt, 3mm wrench size. Tighten to 4 ft lbs. First check the oil lines for kinks, leaks, or air bubbles. The blue or green colored oil is visible inside the 1/8″ ID clear oil hoses. The oil pump cover is not installed by Tomos, so that the final assembler will notice if there is air in the oil lines or blue two stroke injector oil leaking. The left oil line (into pump) is from the oil tank under the seat. It’s the “supply line”. The right oil line “output line” is from the pump to the carburetor. At the far left is the M3 bleed screw. When the bleed screw is removed, oil (and air) will drain out of the supply line (as long as the oil tank is not empty). It takes a couple of minutes to bleed the supply line. The output line cannot be bled. Only on a used bike that has been ran without oil in the tank will the output line have air in it. To elimate air from the outlet line, you run the engine on 50:1 premix for a couple of miles, or about 10 minutes. When the outlet line is full of oil, you replace the premix gasoline with straight gasoline, so it doesn’t smoke from twice as much oil.

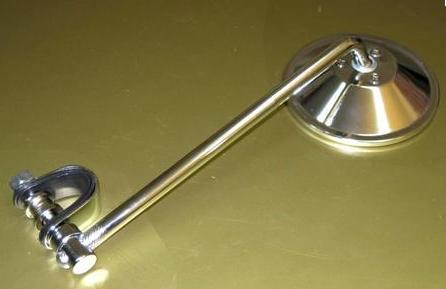
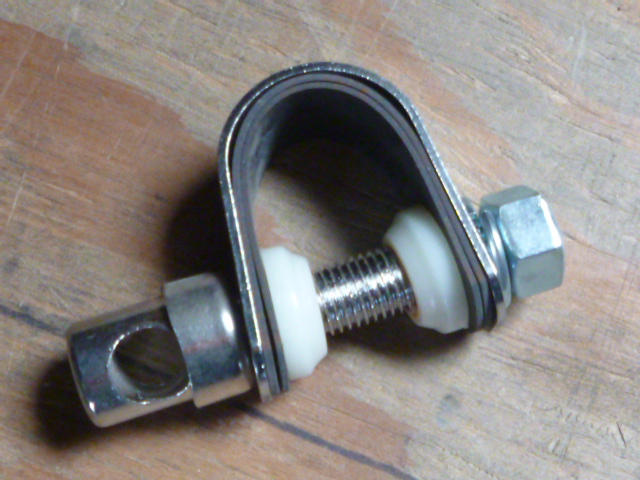
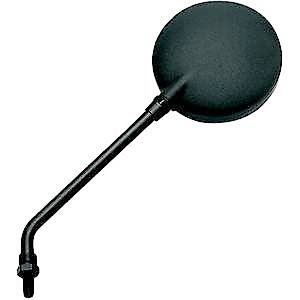
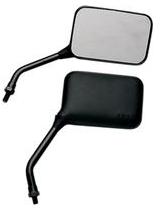
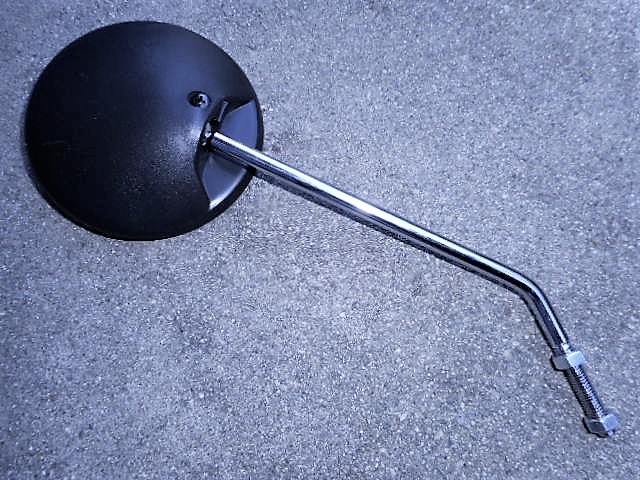
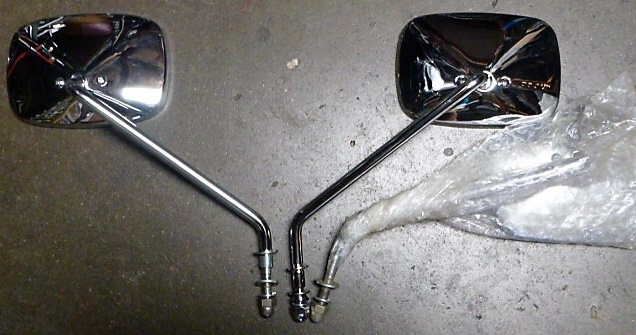
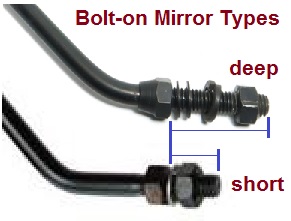
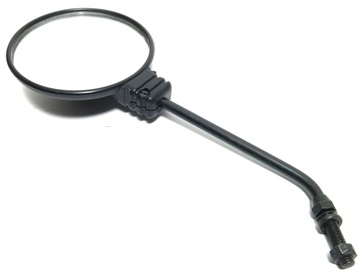
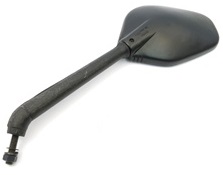
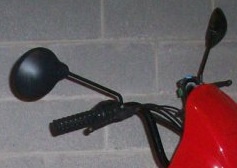
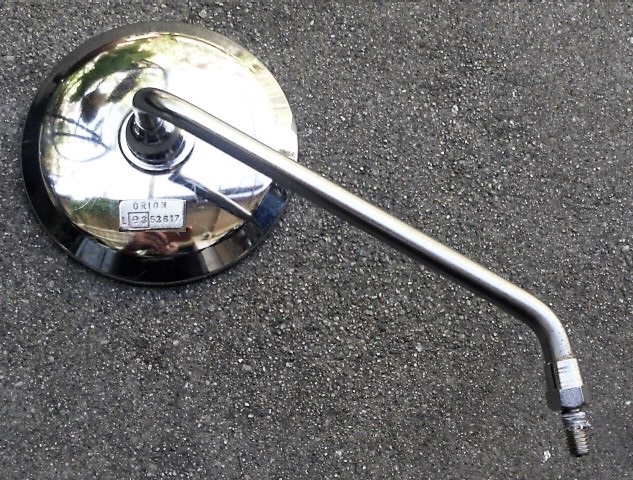
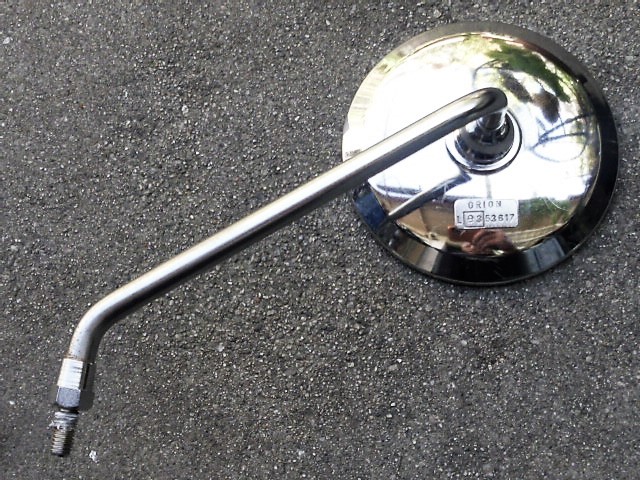
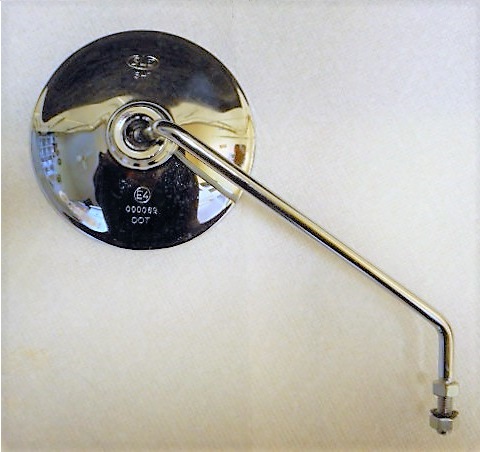
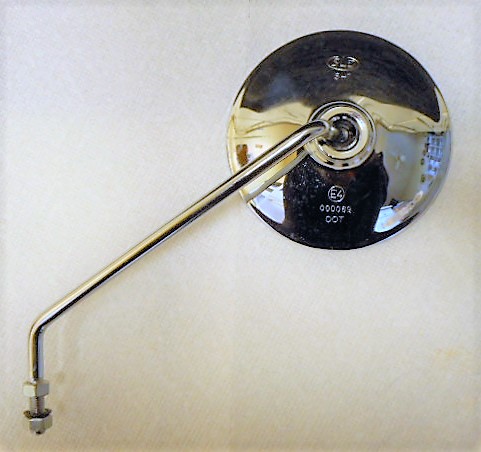
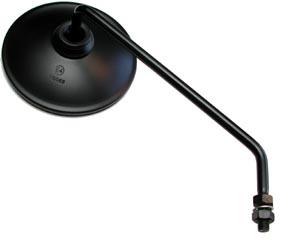
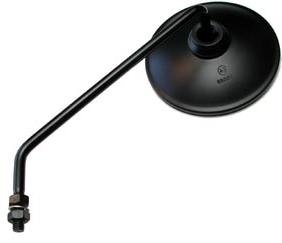
5. Install the mirror. Grease the threads first. Lock the two 13mm nuts to each other, in the right location, to make it possible to take the mirror off and on without tools. If the threads in the hole get damaged, use an 8mm x 1.25 tap, with oil, to repair the threads.

6. Install the fairing brackets. (ST and LX models only) The two shiny metal brackets, a few inches long, go from the headlight holder M6 clamp bolt, hex head, downward and outward to the lower fairing sheet screws and “clip” nuts. From outside to inside, goes: the bolt head, the bracket going down and out, the M6 washer, the chrome headlight clamp/holder, and on the back inner side of that, the M6 nut, which requires a strong squeeze with strong fingers or channel lock pliers, to get started. Position top of headlight holder close (1/2 to 3/4 inch) to the top of the fork tube, and tighten the first side enough to keep it from sliding back down while you’re installing the bolt on the other side. Once both sides are on correct, align them to make headlight point straight and level, left to right. Then tighten to 6 ft-lb.

7A. Install the front turn signals. (for Sprint, ST, LX) For Sprint, M10 bolts substitute for turn signals. Remove headlight to work on turn signals behind it. Leave wires plugged in. Install turn signals, 17mm hex nuts. Rotate “dash” back towards the rider, so it hides the cables and faces the rider. Tighten the turn signal nuts, to about 8 ft-lbs. Align the turn signals so they point straight ahead and don’t look goofy. Put the headlight back on.

7B. Install the front turn signals. (for Revival, Streetmate, Streetmate-R) For Streetmate-R, to make the front turn signals look nicer, grind or cut off rubber nubs on turn signal, that are supposed to go into holes. Without cutting them, they dont sit flush against the headlight mounts, which have to holes for the nubs. Install turn signals, 17mm hex nuts.  Tighten the turn signal nuts, to about 8 ft-lbs. Align the turn signals so they point straight ahead and don’t look goofy.

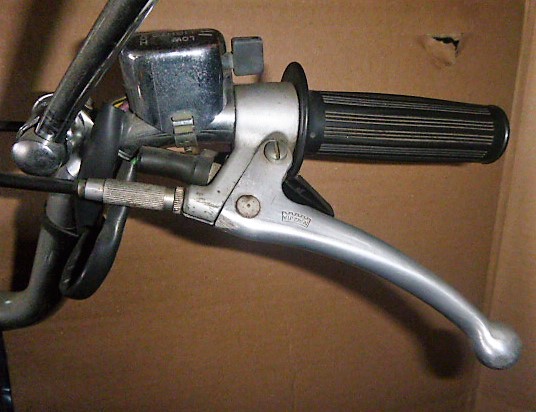
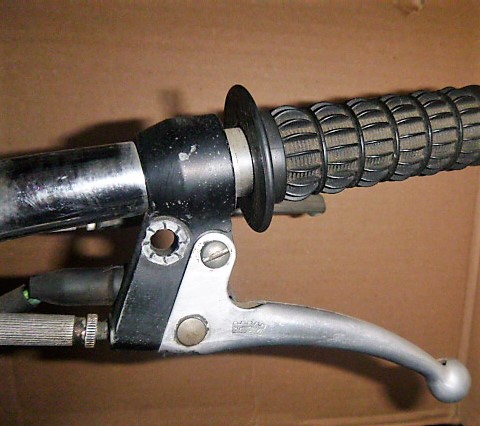
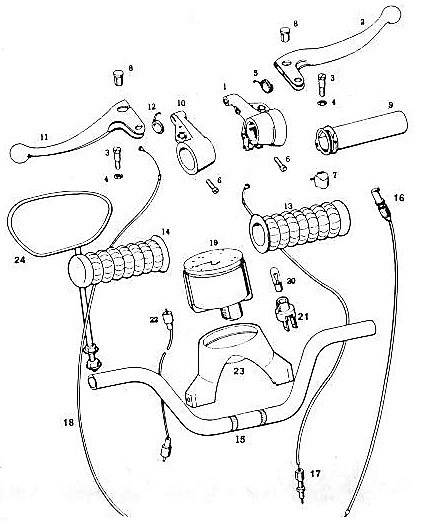
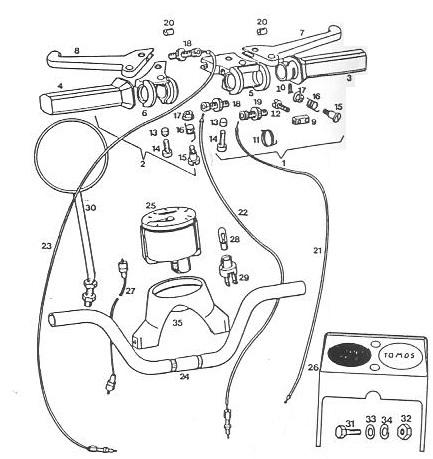
8. Position the cables and wires. Pull the zip ties around each upper handlebar, down to the lower part, to tuck in and hide the wires. It’s OK to kink electrical wires, but it’as never OK to kink control cables. They need to bend the least possible. Position speedo cable so it’s not hanging out, and where it goes as straight as possible. Sometimes it needs the front axle nuts, 19mm hex, loosened and the speedo driver repositioned at a different angle to make the speedo cable less bent.


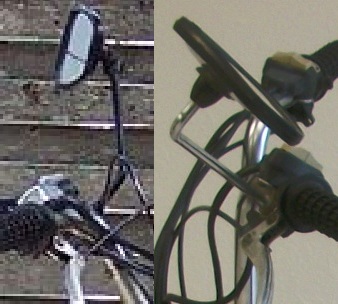
Left, ST, right, Streetmate-R, handlebar, speedo/dashboard, cables, and wires positioned and routed correctly.

10. Install the fairing. Two upper M6 cap nuts & washers, and two lower sheet metal screws and M5 washers. For Streetmate-R, the fairing is already installed. Just rotate the fairing and the dual headlight back so the top of the fairing is close to the speedometer, like shown above. Aim the headlight so it points to the ground about 50 ft ahead of the bike when the tires are on the ground. Move either the right or left  headlight mount up or down the fork to center the fairing left to right. Then tighten everything.

11. Install the pedals onto the pedal arms. L is left thread. R is right thread (clockwise = tighten). Easy to confuse R & L.

11A. Install the left arm onto the left pedal shaft. Push in the wedge pin. It may need wiggling or light tapping. Strike the head while holding a weight against the back of the pedal arm, to seat the wedge. Then tighten the M7 nut (11 hex) to 8 ft-lbs.

11B. Install the right arm and pedal shaft pieces, innermost first: the washer, the coil spring, the cup, and the finger-size tube last. Then with the left side pedal straight down, push the pedal arm onto the shaft, with light tapping, then push the wedge pin in, with the head pointing the opposite direction as the left side. Some wiggling and light tapping are all that’s normally needed. Again, strike the head while holding a weight against the back of the pedal arm, to seat the wedge, and then tighten the nut.

Above, the right pedal shaft hole is sometimes not centered very well. The plastic must be cut or melted.

11C. Sometimes the plastic engine cover needs to be removed, or even trimmed (cut) to make room for the pedal shaft washer and pieces. A Dremmel high speed cutting tool can make the hole bigger on one side, usually in the 11 o’clock position, like shown here. A more primitive way is by melting with a hot knife or screwdriver, not recomended for everyone.

12. Install the rear turn signals. (for ST & LX models only) Make sure wires are plugged in good, and they don’t easily unplug. Tighten 17mm hex nuts. Battery models Revival, Streetmate, Streetmate-R come in a wider box with the rear turn signals already installed.

13. Air up the tires. 40psi rear and 35psi front. Put some 91 octane gas in the tank. Put some 2-cycle oil in the oil tank.

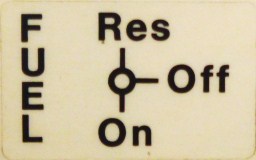
14. Start the engine. Put the choke lever up. Put the gas valve on reserve. Kill switch on “on”. Kick it several times, with no throttle. After it starts and runs for maybe 10-20 seconds, then flip the choke lever down to put the choke off. If it fades out when throttle is opened, then put the choke back on again for a few seconds. After it runs for a few minutes, it should idle OK, not well, and start easy, in one kick. Once the engine gets over 10 miles, it becomes “broken in” and the idle and ease of starting get better. When they are brand new, they take several kicks to start. After the initial break-in, they always start on the first kick, hot or cold (with choke).

15. Check everything. Lights, brakes, horn, transmission, controls. Test ride and get used to it. Isn’t it fun?

2012 Tail Light made by Saturnus


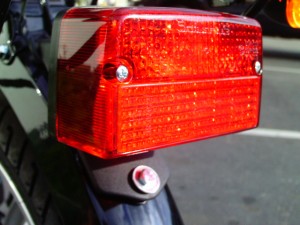
Above, close up of 2012 tail light, made by Saturnus, not the 1977-2011 CEV one.

Preparation: Extra things to do after assembly

After the new Tomos moped is assembled and operational, there may be some optional things to do to make it better.

1. Round off the brake cams. Many of the drum brake cams, 2008 and later, have sharp corners that need to be rounded to make the brake work better. Whenever the wheel is off, the brake cam should be checked. At left is a brand new brake plate (panel) assembly, showing the brake cam. It’s the thing that pushes the brake shoes apart when it rotates in the direction that the cable pulls it. From this view, the cable pulls upward, causing the brake cam to rotate counterclockwise, which causes the lower right edge to push the right brake shoe outward, and the upper left edge (not visible) to push the left brake shoe outward. So only two of the four edges of the brake cam are active. The two edges that don’t do anything don’t need to be rounded.


Left, a not-rounded brake cam. Right, a rounded brake cam, after grinding and filing. The other rounded edge is catty corner to the one shown. Reinstall the brake shoes like folding a taco into a tortilla. Rotate the cam backwards to expose the parts that rub against the brake shoes, then apply a tiny speck (1/2 a match head) of grease on those two areas only.

The 105mm Tomos brakes are fine without this. Even without rounding, they stop better than most other moped brakes with 80 or 90mm drums. But with this done they’re awesome. A properly rounded Tomos front drum brake can stop almost as fast as a Tomos front disk brake does, in about 3 or 4 car lengths from 40 mph. You can’t tell if the brake cams need rounding, except by looking directly. Once rounded, a rear brake will skid with two fingers.

Be advised. It takes more skill to use the brakes hard. It’s easy to skid and fall down. See the Safety department.

2. Check the rear brake, maybe add washers  (for Sprint, ST, LX) On the 2008-later box style swingarm, the brake plate anchor post is so long that one or two 12mm washers need to be added to space out the brake plate. Most 2008- early 2009 did not come with washers. They either had to have their back wheel adjusted crooked, where the front is to the left, or their brake was rubbing, slowing the bike down and maybe squealing, because their brake plate changed shape when the axle nuts were tightened. In 2010 and after, one or two 12 x 18 x 1.5mm thick washers were installed, between the brake plate and the swingarm. The parts manuals do not show these. When there’s not enough washers, the wheel cannot be centered in the frame without making the brake rub. When the wheel is centered, axle nuts tight, it spins freely with the chain off, and the brake works and doesn’t stick, then it’s all proper. No other moped wheel and brake is as strong, long lasting, precise, and well made as a modern Tomos aluminum wheel.

3. Paint a white arrow mark on the black gas valve. Now you can tell easily if the gas is on, off, or reserve.

4. Check the steering stop, maybe make it wider (for Streetmate and Streetmate-R) Some 2008-later Streetmate-R models need the steering stop made wider, to allow the fork to not hit the faux tank when turned fully to either side.

Left, the original Streetmate-R steering stop. Right, with adaptor piece installed to make it wider.

Above, left and right steering travel should be limited by the solid frame stop. Nothing else should touch.

There’s no easy way to make a steering stop wider. Myrons does this: A strip of metal is formed into a loop, welded shut, and hammered onto the frame. It’s hard to guess the right size and shape to make it a tight press fit. Here’s one that has been formed and fitted, but has not yet been welded into a solid loop.


Performance Modifications

April 29, 2010

What not to drive to work:

Roland Sands new Indian  streamliner "The Spirit of Munro"

Roland Sands new Indian streamliner “The Spirit of Munro” Click here to see more.

Welcome, friends of tiny pistons. If you want a reliable, clean, safe, easy, cost-effective way to get power, or torque, read on. If you want to go real fast, like over 45 mph, make noise, clouds of smoke, spend a lot of money, and leave a trail of blown-up engines and ruined parts, then you can read how to do that elsewhere. The low-emission low-friction Tomos A55 stock engine is happy going 40-45 mph, all the time, for many thousands of miles, and occasionally hitting 50, with minimal modifications.

Shaun has done much research on enhancing the performance of the 2007 Tomos A55. The result was the A55 engine already is very efficient, so much that it was too powerful and needed an intake restrictor and a excessively big back sprocket to keep it under the legal limits of speed and power. The A55 is a low emission two stroke engine with modern technology. Tapered curved directed nozzle transfer ports, low-friction, high strength cylinder wall, with big all aluminum cylinder for better cooling, oval venturi carburetor with multiple jets. Needle bearings on both rod ends, a third outer crankshaft ball bearing, splines for the clutch hub, make the Tomos A55 engine durable, efficient and also easy to service.

MAGICAL AIR BOX: If you run it without the air box, and with a bigger jet, it goes maybe 1/2 mph faster, but looses a lot of low end torque, and climbs hills worse. Put back the stock 55 jet and air box, but cut the “elephant trunk” off of the rubber connector between the carburetor and the air filter, and round out the rubber into a bell, instead of a reverse bell. The still air in the middle of the frame is somehow easier for the engine to breathe in, than the moving air outside. Flip the stock air box 180 degrees, so the outlet is facing out, instead of into the hole in the frame, and the bike looses power, about 1 mph. Anything else you do, like drilling holes in the air box, making the 17mm inlet tube 19mm, making it 15mm, or running a hi-flow foam filter, causes a noticible loss of accelleration and power. Apparently Tomos has found a shape and size that silences the intake roar, houses the air filter, and somehow helps the engine breathe better at low to mid rpms. All of the development to make the A55 meet 2006 US EPA Pollution Standards had the side effect of making more power.

Here is a link to 50cc racers. They are not mopeds, but their pistons are the same size. Back in the 1970’s, 50cc racing motorcycles all went over 100mph, even the slowest ones. At the Hockenheimring in Germany the fastest ones averaged 126mph! A 50cc racer can produce 18 horsepower, while a 50cc moped makes less than 2 hp. That is because a moped is a power-limited-50, spinning to only 6000rpm. While the racer with a 6 speed transmission spins to 18,000 rpm. The racer gulps three times as much air in each revolution. The combination of 3 times the volumetric efficiency times 3 times the rotational speed, accounts for the 9  fold difference in power.  It’s better to start with something that’s not limited. Unlimited stock 50cc bikes like a 1982 Honda MB5, and some automatic 50cc sport scooters, like a 2003 Aprilia RS50, already do 45-50mph. It is better to let Honda or Aprilia do the engineering and development, than to think you can make it better than them. Sure you can make it faster, but at what price? You will likely loose something like money, reliability, convenience, operating cost, or gas mileage. The big companies have already considered all of the possible modifications, and perhaps even built and tried some of them, but decided not to make their bikes that way for a reason.


http://www.elsberg-tuning.dk/50ccroadracing.html