Indian Service
Selected Topics
1978 Dealer Service Manual free pdf
Tightening Torques
This is from the Haynes “Honda 4-Stroke Mopeds 49cc PC and PF OHV models 1970-on” service manual. It is the same engine as Indian.
xmm-0.0..0 ft-lbs torque specification
0M5-0.0 5.1-8.0 valve adjust nuts
0M6-0.0 5.8-8.7 valve cover nuts
0M6-0.0 6.5-8.7 head nuts
0M6-0.0 5.1-8.7 case and cover bolts
0M6-0.0 6.5-8.7 camshaft and intake bolts
M10-0.0 22-28 flywheel and clutch nuts
M12-0.0 15-22 oil drain plug
Compression test
The Indian service manual does not state the compression pressure or the compression ratio. But the Indian motor is a copy of an earlier Honda PC50K1 motor. The Haynes “Honda 4-Stroke Mopeds 49cc PC and PF OHV models 1970-on” service manual does state the compression ratio, 8.5 to 1.
The compression test pressure can be calculated from the compression ratio, the displacement (swept volume), atmospheric pressure at sea level (14.7 psi), and the ideal gas law.
P2/P1=V1/V2 P2/14.7=8.5 P2=125 psi relative to a vacuum
Minus the atmosphere, about 15 psi P=125-15=110 psi this is the ideal pressure
Actual “new” compression pressure would be 5-10 psi less than ideal because of leaks and the small additional volume of the pressure gauge hose.
So Pnew = 100 to 105 psi So over 95 psi is good, under 90 psi is bad
Ring Gap
A new ring in a new cylinder has a gap of 0.007 inch (7 thousandths).
Place a used ring at the very top of the cylinder where there is no wear. A gap of 0.007″ to 0.011″ is OK. Over about 0.011″ indicates excessive ring wear.
Place that same ring about 5/8″ below the top. That is the maximum wear area. Compare the ring gap there with the ring gap at the very top. A difference of over about 0.005″ indicates excessive cylinder wear.
Crankcase vent
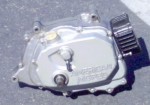
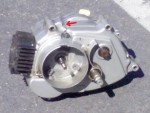
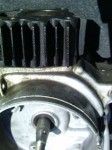
Here is an Indian engine, minus head and magneto. Red arrow is a crankcase vent. If it is blocked off or clogged, the bike will only run for a while. Blow-by past the rings causes the pressure to increase. The high crankcase pressure cancels some or most of the intake vacuum suction pressure.
Cylinder Wear
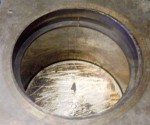
Right, close up of the fresh cylinder wall. You can see the reflection of the marks on the piston crown on the exhaust side (back) cylinder wall. A new Indian 42mm ring with a gap of only 0.007″ shows there is almost no wear.
The Haynes PC50 manual states the cylinder wear specs):
42.00 – 42.02 mm Cylinder (cast iron) bore diameter wear limit 42.1
41.98 – 42.00 mm Piston (aluminum) skirt diameter
0.10 mm (0.004″) Ring gap minimum
Valve Timing
At right is page 14 from the Indian Service Manual showing the timing marks on the cam.
Valve Adjustment
From the service manual, the valve clearance when cold is adjusted to be 0.002 inch (two thousandths). It can be a little more than that without any harm, other than the valve will open a tiny bit less.
Indian Magneto Service
A. Indian Moped: 4-Coil Magneto – Wires Service
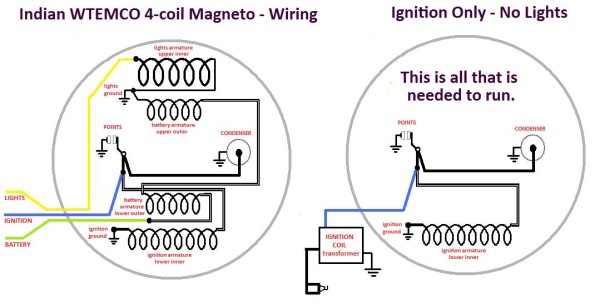
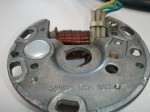
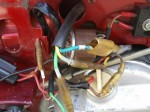
The entire Indian WTEMCO flywheel/magneto is Bosch compatible. Indian has the same engine, controls, switches, and wiring as a Honda PC50. It looks like the light green wire goes to the ignition armature, but there is no connection. The ignition armature has a support tab for the battery charging coil next to it. That tab is the black dot in the wiring diagram, where the light green wire originates.
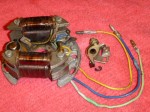
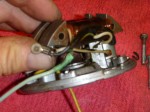
Indian Magneto 1
After the lite green and blue cut wires were repaired, the solid copper source coil wire with the white cloth sheath was ready to break off of the blue ignition wire.
Indian Magneto 2
The black condenser wire was partially melted under the source coil, and smashed flat against the stator plate. Here shows the resin that was poured over the coils, after the wires were in position.

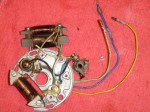
Indian Magneto 3 (big)
The excess resin is grinded off. All wires are exposed. Any loose connections are cleaned and re-soldered. Lite green is for battery charging. It goes through both small outer coils, in series. Yellow is (main) lights. Blue is ignition.
Indian Magneto 4
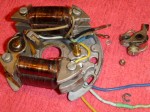
The 3 branches from the points are 1) blue wire to outside coil, 2) black wire to condenser, 3) white cloth wire to source coil. The ignition ground is on the bottom left coil bolt, shown here at top right.
Indian Magneto 5
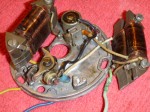
The blue wire plus white wire eyelet, and the black wire eyelet go on the points, but cannot touch anything metal nearby.
Indian Magneto 6
All 3 wires get fatigued where they pass through the hole in the stator plate. Here the points are back on. The light green will go through the hole next, then the lower two coils bolted on after that.
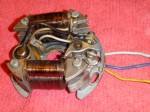
Indian Magneto 7
Coils are on. Ignition ground is checked, top right (bottom left when installed). Next the loose wires will be tucked in under the coil. Yours first might need rearranging. Don’t let sharp edges rub.
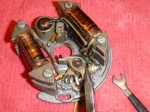
Indian Magneto 8
Points wire bolt and nut are both 5.5mm hex. Be careful to keep the leaf spring centered while tightening, by holding the bolt solid with the needle nose pliers while tightening the nut.
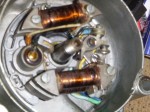
Indian Magneto 9
Still oriented upside down. Tested and ready for flywheel installation, after stator screws are in.
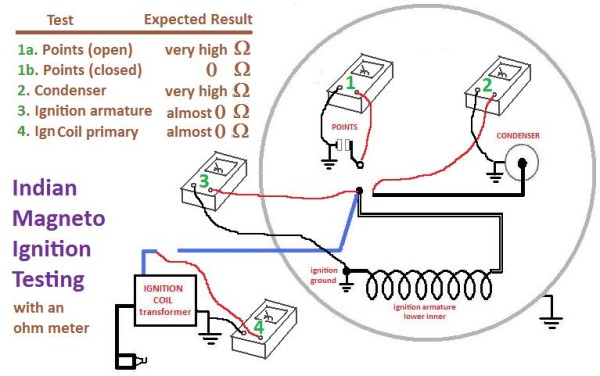
Testing for spark is done with the essential wires connected. Stationary testing for continuity is done with the essential wires disconnected, as shown below.
When each test is performed, the wires are wiggled and prodded to see if the ohms reading changes. Sometimes a conductor will conduct until it is moved a certain way. Sometimes an insulator will insulate until it is moved a certain way. During each test the tester is tested by either disconnecting or connecting the test leads. Most ohmeters do not have a sensitive enough scale to go down below 1 or 2 ohms. Sometimes “testing the tester” by shorting the test leads, shows the slight difference.
B. Indian Moped: 2-Coil Magneto – Wires Service
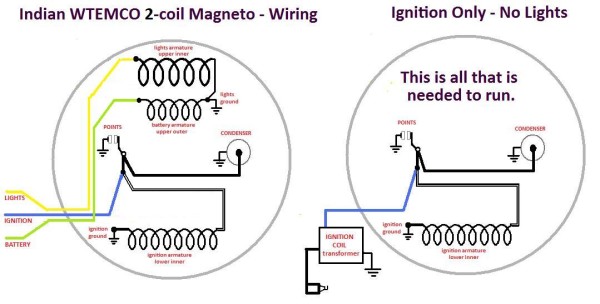
The entire Indian WTEMCO flywheel/magneto is Bosch 90mm compatible. Early Indians had 4-coil, while most have 2-coil. The 2-coil magneto has the ignition coil (45mm bolt spacing) on the bottom and the lighting coil (52mm bolt spacing) on top, like the 4-coil. But the two outboard battery charging armatures on the 4-coil have been incorporated into the single lighting coil on the 2-coil. The connections and function is all the same, as is the troubleshooting. One good thing about Indian magnetos is that both kinds have an internal ignition ground. It is on the lower left armature bolt. On many mopeds it is external, and part of the brake light.
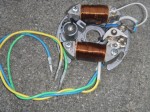
Indian 2-coil magneto:
Condenser wire passes near top left bolt, so the lights coil doesn’t pinch it.
White cloth ignition wire gets soldered to the condenser. Then the blue and white get “tucked in”.
Once again, the ignition part of it is the same. In fact, schematically it’s the same for all points-magneto ignitions. Imagine a fork with 3 prongs: one prong is points, one prong is condenser, one prong is source coil (armature). The three prongs join together as one, the handle of the fork, which is the wire going to the ignition coil (transformer). To static test each prong separately with an ohm meter or continuity tester, the wires detach at the points with eyelet connectors. See above for the exact same procedure. As a reminder, checking for spark is completely different and separate from checking the ignition components for continuity. Checking for spark is done with everything assembled and connected, with essential wires grounded, if any, and “kill” wires left disconnected.
When a condenser is replaced, the lights coil is unbolted, and the new condenser wire is laid under it, to prevent it from rubbing against the rotating flywheel points cam. The thicker lights coil will pinch the condenser wire unless it is positioned in the corner before the coil bolts are tightened. Verify it and all other wires are not being pinched by tugging on them and feeling or seeing if they can move freely.
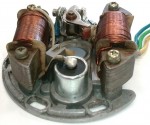
Indian WTEMCO 2-coil magneto is actually 3-coil because the lights coil and battery coil are one unit.

Indian WTEMCO 2-coil magneto top view of lighting armature showing wire clamp and improved wire routing
Indian Magneto Substitution
The entire 82mm WTEMCO magneto is a 90mm Bosch compatible. Any 90mm Bosch magneto will bolt on and fit, both the 3-bolt stator plate and the flywheel. However, the ignition timing in the flywheel is different on the various Bosch flywheels. An Indian flywheel has the same timing angle as a Tomos. Both of those bikes can take an entire Puch magneto, but it must be installed without the woodruff key, and positioned at the correct timing angle. It must be very tight, and can still slip later. Many of the modern CDI ignitions require that the woodruff key be left off, and the flywheel positioned at a particular angle on the crank. Such is the case if someone wanted to run a modern CDI ignition made for a Puch, on an Indian. Some more talk about this is in the Indian parts section.
The stationary part of the magneto, the stator, can not be substituted with a 90mm Bosch moped stator, such as one for a Puch.
If the entire magneto is substituted, the 5 or 6 Puch wires will have to become 3. On a Puch 6-wire stator, 2 of the output wires are actually grounds (green/black = brake light ground, and blue/black = ignition ground). Once they are grounded, and the grey tail light wire is left unused, then a Puch 6-wire will directly substitute for Indian 3-wire, blue for blue, yellow for yellow, and green for green. Knowing this should help many Indian owners that have very bad stators or none at all.
The armatures on a Bosch stator (Puch) are 54mm hole spacing, both upper and lower mounts. The WTEMCO Indian ones are 52mm on the upper (lights) and 45mm on the lower (ignition). So Puch armatures don’t interchange with Indian ones.
Notes about Indian magneto substitution:
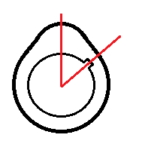
With the piston is parked at top dead center, the rod is in the 12 o’clock position, straight up in this view. The woodruff key for the magneto flywheel is in the 1:15 position, or about 38 degrees. A Puch 1-speed crank has the same size and taper, but the key in the 12:00 position. However, a Tomos crank does have the same size, taper and key position as an Indian. Too bad early Tomos magnetos are scarce because they get rusty from trapped water. 1996-2006 Tomos A35 CDI-ignition, with 70 watts of lights power, magnetos would substitute if the coil is changed to the Tomos A35 coil with CDI unit built-in.
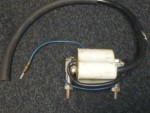
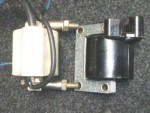
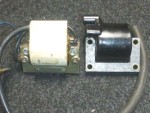
Ignition Coil Substitution
The Wtemco coil bolt hole centers are 58mm apart. The Bosch coil holes are 53mm. That is not so bad, but the metal plates are taller. Since the Wtemco coil plates are already up against the floor plate of the frame, there is no room for a Bosch coil in the same location. It would have to be hung with one bolt, at an angle. Furthermore the Bosch bolt holes are for 5mm bolts, whle the Wtemco ones are 6mm. So a special step stud 5-6mm is needed. Fortunately there are some 5-6 step studs on a Motobecane, that are the correct length.

