Encarwi Carb Service for Tomos A3 1974-83
This very simple, early Tomos carb is designed to be serviced without removal. After 1985, Tomos A3 & A35 models came with Dellorto SHA14/12 carburetors. The Tomos A3 carburetor is in a confined area above the engine and below the sheet metal gas tank/frame. It is difficult to remove.
Two super usfeul and easy checks:
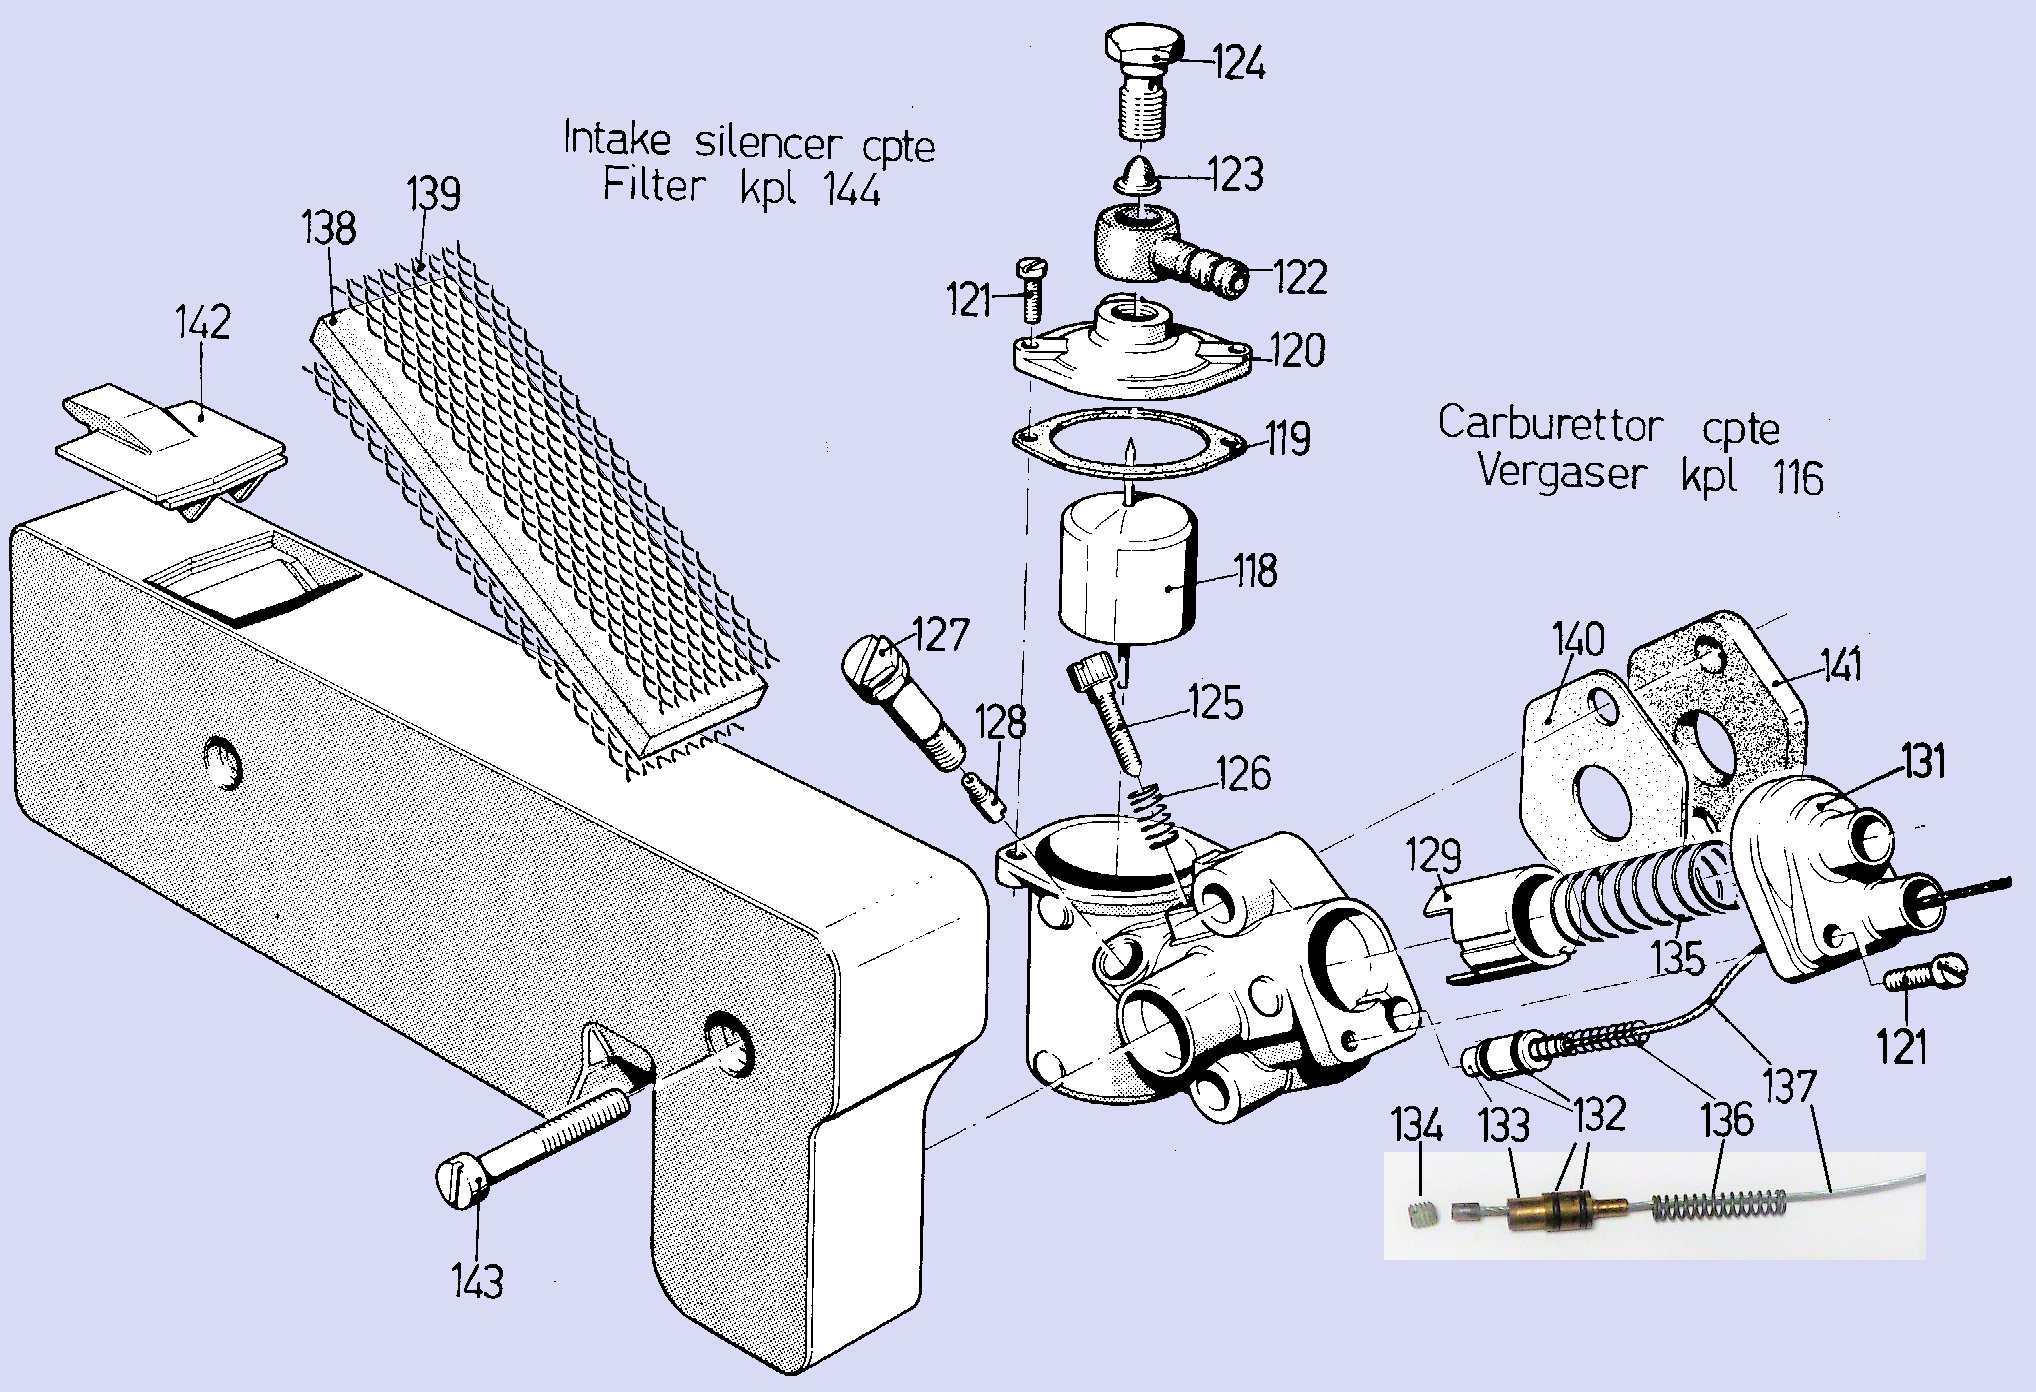
1) Check the jet. With a large flat head screwdriver or a 9mm wrench, remove the jet holder #2. Remove the jet #2 with a medium-thin flat head screwdriver. Hold the jet up to a light source, such as a sunny white wall. Look through the tiny hole to see if light gets through. If it’s pitch black it’s completely blocked. If it’s not circular then it’s partially blocked, like by a fiber.
2) Check everything else. When the jet holder is removed, and the gas valve is turned on, gasoline should flow out of the gas tank, through the banjo bolt #16 at the float top #12, and then dribble out the hole where the jet holder was. This is a way to quickly test the fuel system, tank, valve, line, filter, and float, all at once.
If gas does not spill out with the jet holder removed, then gas is not getting to the jet. Check if gas comes out of the tank. If gas is getting to the carburetor, but not getting to the jet, then either the inlet banjo #14 or banjo bolt #16 is clogged, or the float top #12 is clogged, or the float #11 is in upside down, or the float is stuck in the up position. Several things can cause this kind of float to stay up and not drop down and let gas come into the float bowl reservoir: being installed upside down (pointy end goes up), rust powder filling up the guide hole at the bottom of the float chamber, the float bulb being pushed too far down the rod, the wrong float, or a dented float chamber wall.
Servicing
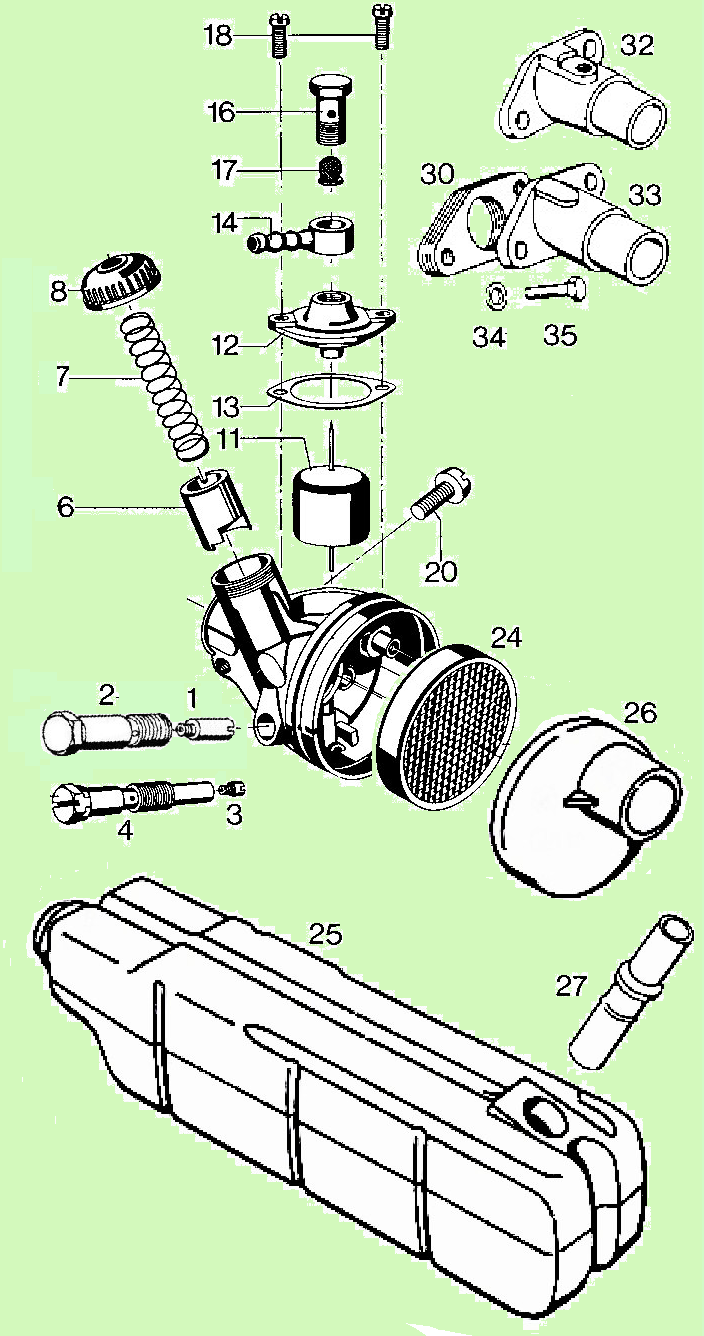
The jet holder #4 unscrews from the left side. It holds the jet #3, Bing 3.5mm size 46.
To remove an old, hard, shrunken and very stuck on, fuel hose, be careful not to break off the “neck of the banjo”. That means you only pull straight out and rotate, never pull or twist sideways. If that fails, a diagonal pliers aka dikes aka wire cutters, can be used to cut the old fuel line, parallel to the hose, without cutting the banjo underneath. The cut does not need to go all the way through the old fuel hose, but far enough to weaken it.
To service the float, loosen the clamp screw #20 and rotate the carb so it is tipped to the right. Remove the 11mm hex head banjo bolt. Remove the two slot head screws #18. Lift off the float top. Lift out the float with your fingers. It should lift out freely and not feel stuck.
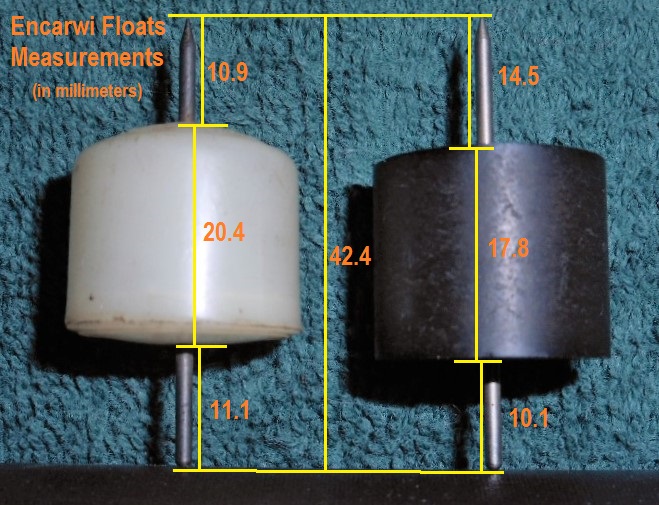
Float versions, left 70’s bulb, right 90’s solid
Things that cause not enough gas:
Rust powder filling up the guide hole at the bottom of the float chamber. Remedy is twisting a correct size drill bit with your fingers, to pull the powder up and out of the hole. With the jet holder removed and the gas valve turned on, gasoline should flow out of the tank, through the float valve, and spill out the jet holder hole. The amount should be enough to fill the float reservoir in a few seconds, which is roughly a spoonful every 4 seconds.
The bulb being pushed too far down the rod. Remedy is to push it back up. See the above photo with measurements.
Dented float chamber wall. Remedy is to grind or sand down the high spot.
Blocked float reservoir air vent. Gasoline cannot come in unless air can get out. Remedy is to find where it is blocked at, and remove the blockage. The vent follows a channel in the back mounting surface. An empty float reservoir should fill up in a few seconds after the gas valve is turned on. To test for a blocked air vent, first empty the reservoir, then turn the gas valve on for 8 seconds and then off. Then remove the jet holder, allowing gas to dribble out, to see how much gasoline there was in the reservoir.
Blocked gas tank air vent. Gasoline cannot leave the gas tank unless air comes in. So there is a pin hole in the gas cap. When the tank is full, and the vent hole is blocked, the bike will seem to run out of gas. To test for a blocked gas cap vent hole, first fill the gas tank, then close the gas valve, then remove the fuel hose. Place a clean container under it (to check for purity and to put the gas back in the tank). Turn on the gas and observe the flow. It will flow normal at first. But in a few seconds, as negative pressure builds up, the flow will slow down and stop, if the vent is blocked. If the flow continues for 20-30 seconds (or indefinitely) then the gas tank is vented.
Things that cause too much gas:
Worn float needle tip. Remedy is to sharpen it. Examine the tip with a magnifier. Spin the float with a drill while pressing the tip gently against a sheet of emery cloth or very fine sandpaper, at the same angle, and move it slowly around to fresh parts of the sandpaper. The needle rod must be straight first. Examine the tip with a magnifier. There should be, everywhere on the cone tip, circular sanding marks, and no more circular “potholes”.
The needle is bent. Remedy is to straighten it. Normally the bend is just above the top of the bulb. It is done with just fingers and eyes. Rotate to see which way it needs to go. Bend a little. Repeat.
The bulb being pushed too far up the rod. Remedy is to push it back down. See the above photo with measurements.
Worn float seat hole. The float valve seat is part of the float top. It is the tiny hole at the bottom of the small hole. Examine the hole with a magnifier. It should be perfectly circular and free of nicks and scratches. Polish it with a spinning tooth pick, or the stalk of a Q-tip.
Float bulb has gasoline inside it. If the float too heavy, it won’t have enough buoyancy to stop the gasoline from getting in. Remedy is to evacuate the fuel with compressed air, locate the leak hole, and apply a minimal amount of fuel tank sealant.
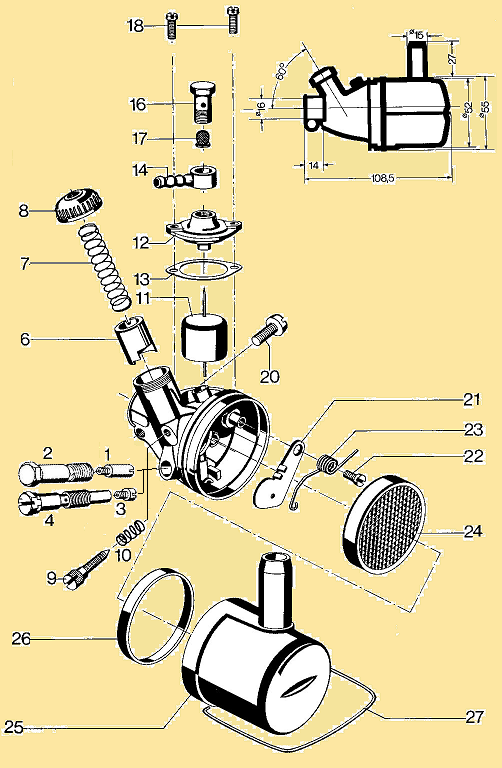
Servicing the M56 engine’s H12 or H8 Carburetor:
One problem unique to this carb is warping of the engine side surface. This is caused by over tightening the two mount bolts, and maybe also because the heat block behind it is semi-soft. The back side must seal not just air, for good idling, but also there is a fuel passage that can leak because of a warped carburetor body. The remedy is to grind the back side flat again, without taking too much off. In the body, there is a narrow fuel hole at the bottom of another hole, that is impossible to see directly. That hole must be checked and cleaned with carb spray and compressed air.
The float is the same as the other carbs. The float top is the same except it has no air vent pin hole. The idea was to not let gas spill out the vent hole. Instead the vent goes to the mounting gasket, where there is a small opening to the atmosphere, higher up.